> ## Documentation Index
> Fetch the complete documentation index at: https://www.mintlify.com/docs/llms.txt
> Use this file to discover all available pages before exploring further.
# Drafts
> Create isolated drafts in the editor that remain private until you request review and publish, without managing Git branches yourself.
Use drafts to work on changes in the editor before publishing to your live site. A draft is an isolated workspace where you draft, preview, and edit content. Your changes are only available in the editor until you choose to publish them.
Drafts are the recommended way to make changes in the editor. Each draft has a Git branch and pull request that the editor manages for you, so you can work without switching branches or opening pull requests.
## How drafts work
**Every edit saves automatically.** As you type, the editor saves your work to Mintlify's servers, then commits changes to the draft's branch in the background. Your changes persist across tabs, devices, and network interruptions.
**Each draft tracks its own version history.** The editor commits changes as you work, so a draft builds up a history of changes on its branch. It also keeps an open pull request that reflects the current state of the draft.
**Nothing goes live until you publish.** A draft never affects your live site while you edit it. You control when its changes deploy.
**Keep multiple drafts at once.** Work on several sets of changes in parallel, each in its own draft, and publish them separately.
Drafts are separate from the deployment branch that builds your live site. Editing a draft never changes your live site until you publish the draft.
## Create a draft
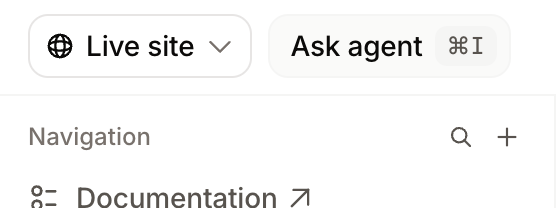
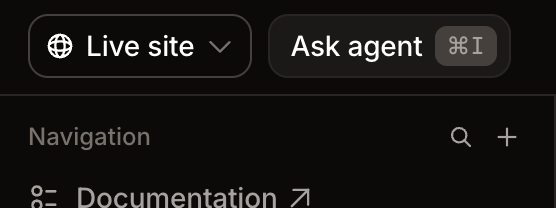
1. Click the deployment selector in the editor toolbar. When you're editing your deployment branch, it displays **Live site**. When you're editing a draft, it displays the name of the draft.
 2. Click the **Drafts** tab.
3. Click **New draft**.
The editor creates the draft and switches to it. New drafts start with the name "Untitled draft." Rename your drafts with descriptive names so you can identify them later.
## Switch between drafts
1. Click the deployment selector in the editor toolbar.
2. Click **Live site** to return to your deployment branch or click another draft to switch to it.
The **Drafts** tab lists your drafts with the time each was last updated, most recent first. Use the search field to filter drafts by name.
## Publish a draft
When your draft is ready, open the publish menu to review your changes and publish. The available actions depend on whether your deployment branch requires review before changes go live.
Click **Publish** in the editor toolbar. The menu lists every pending change in the draft. Click any change to review it.
If your deployment branch requires review, click **Request review** to mark the draft's pull request ready for your team to review. Reviewers approve the pull request from the editor or from your Git provider.
Click **Publish** to merge the draft into your deployment branch and deploy it. If your team requires reviews, **Publish** only becomes available after the pull request receives approval.
Only one publish can happen at a time per draft. If a publish is already in progress, wait for it to finish before publishing again.
## Rename a draft
1. Click the deployment selector in the editor toolbar.
2. Click the **Drafts** tab.
3. Hover over the draft and click the rename icon.
4. Enter a new name and press Enter.
Renaming a draft also updates the title of its pull request.
## Delete a draft
1. Click the deployment selector in the editor toolbar.
2. Click the **Drafts** tab.
3. Hover over the draft and click the delete icon.
4. Confirm the deletion.
Deleting a draft permanently discards its unpublished changes and closes its pull request. You cannot undo this action.
## Drafts versus branches
Drafts and branches both let you work on changes in isolation before publishing. Choose based on how your team works:
* **Use drafts** if you want the editor to manage Git for you.
* **Use branches** if you follow a Git-based workflow and want to name branches, manage pull requests directly, or coordinate with changes made outside the editor. See [Branching and publishing](/editor/branching-and-publishing).
Both options are available in the deployment selector, so you can move between the two approaches at any time.
## Related topics
- [Editor settings for AI and publishing](/docs/editor/settings.md)
- [Automations overview](/docs/automations/index.md)
- [Assistant](/docs/assistant/index.md)
2. Click the **Drafts** tab.
3. Click **New draft**.
The editor creates the draft and switches to it. New drafts start with the name "Untitled draft." Rename your drafts with descriptive names so you can identify them later.
## Switch between drafts
1. Click the deployment selector in the editor toolbar.
2. Click **Live site** to return to your deployment branch or click another draft to switch to it.
The **Drafts** tab lists your drafts with the time each was last updated, most recent first. Use the search field to filter drafts by name.
## Publish a draft
When your draft is ready, open the publish menu to review your changes and publish. The available actions depend on whether your deployment branch requires review before changes go live.
Click **Publish** in the editor toolbar. The menu lists every pending change in the draft. Click any change to review it.
If your deployment branch requires review, click **Request review** to mark the draft's pull request ready for your team to review. Reviewers approve the pull request from the editor or from your Git provider.
Click **Publish** to merge the draft into your deployment branch and deploy it. If your team requires reviews, **Publish** only becomes available after the pull request receives approval.
Only one publish can happen at a time per draft. If a publish is already in progress, wait for it to finish before publishing again.
## Rename a draft
1. Click the deployment selector in the editor toolbar.
2. Click the **Drafts** tab.
3. Hover over the draft and click the rename icon.
4. Enter a new name and press Enter.
Renaming a draft also updates the title of its pull request.
## Delete a draft
1. Click the deployment selector in the editor toolbar.
2. Click the **Drafts** tab.
3. Hover over the draft and click the delete icon.
4. Confirm the deletion.
Deleting a draft permanently discards its unpublished changes and closes its pull request. You cannot undo this action.
## Drafts versus branches
Drafts and branches both let you work on changes in isolation before publishing. Choose based on how your team works:
* **Use drafts** if you want the editor to manage Git for you.
* **Use branches** if you follow a Git-based workflow and want to name branches, manage pull requests directly, or coordinate with changes made outside the editor. See [Branching and publishing](/editor/branching-and-publishing).
Both options are available in the deployment selector, so you can move between the two approaches at any time.
## Related topics
- [Editor settings for AI and publishing](/docs/editor/settings.md)
- [Automations overview](/docs/automations/index.md)
- [Assistant](/docs/assistant/index.md)