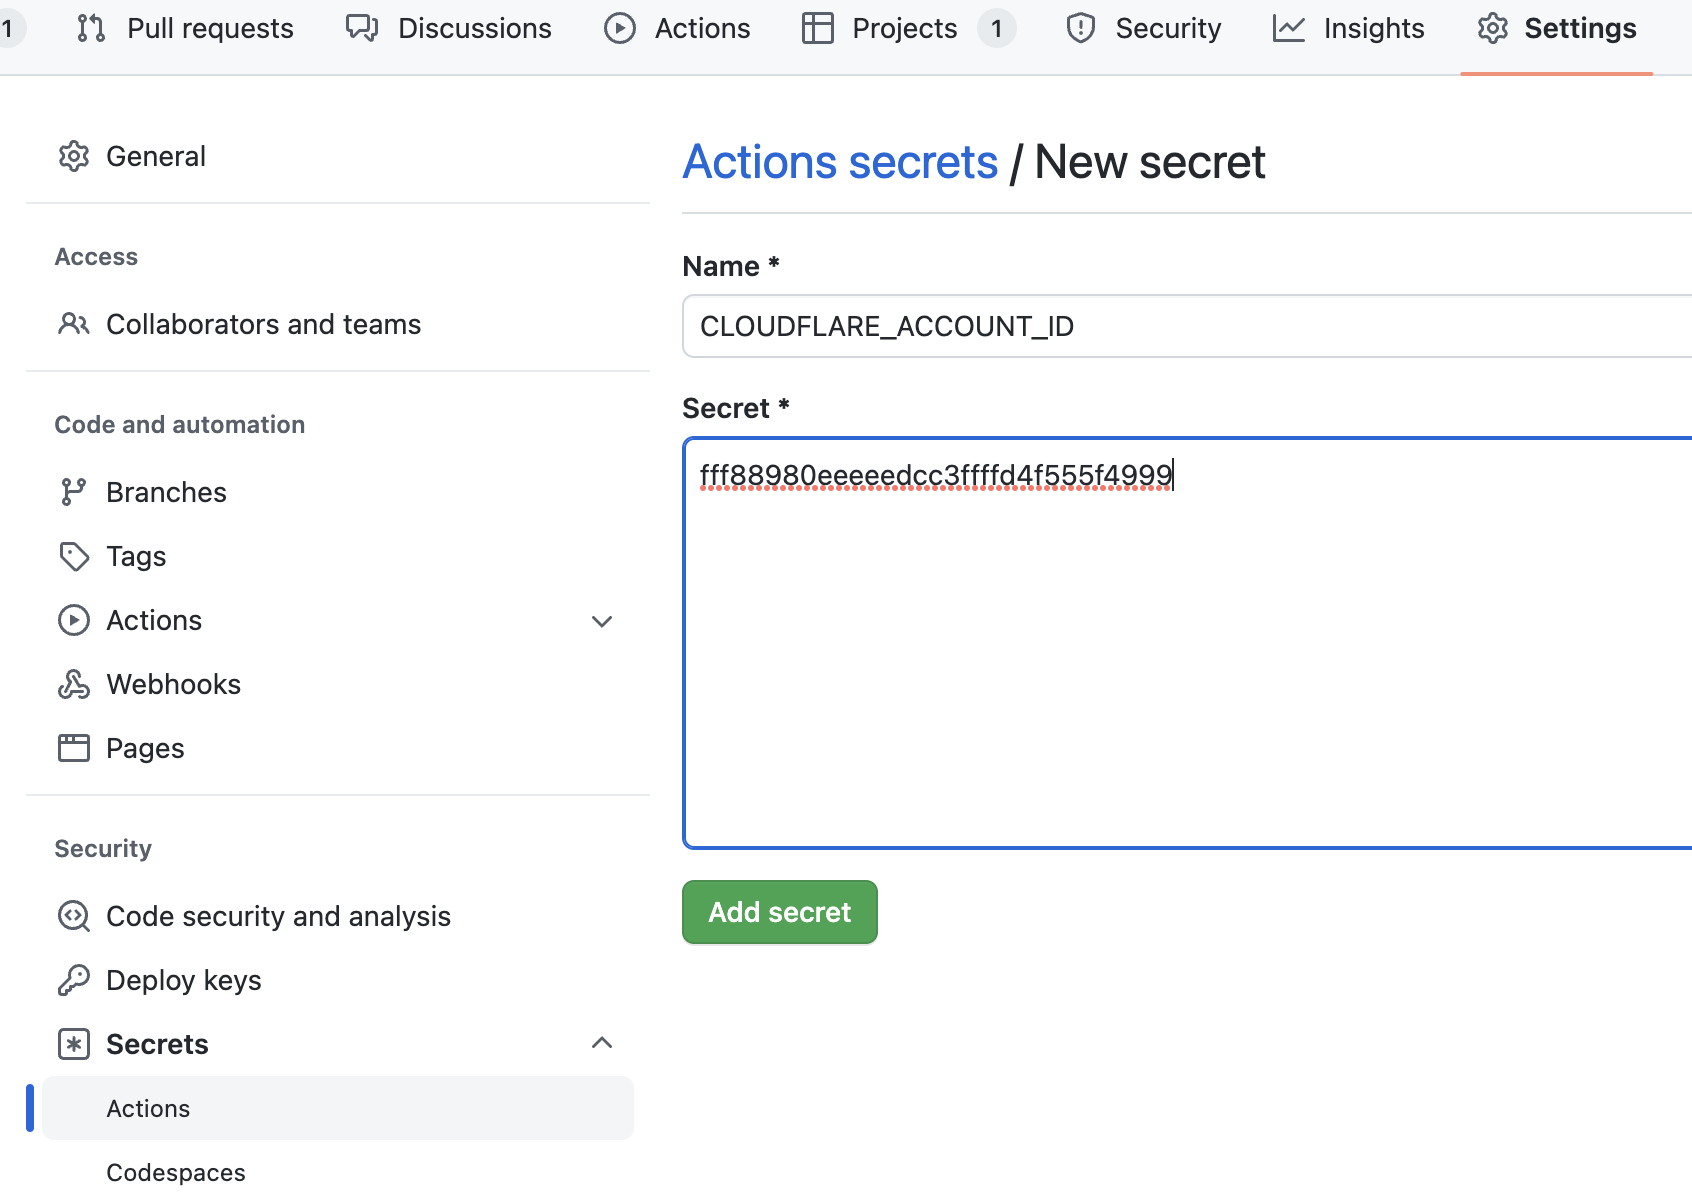
Navigate to secrets settings
Go to your forked repository’s Settings → Secrets and variables → Actions, then click “New repository secret” to add each of the following secrets.Required secrets
CLOUDFLARE_ACCOUNT_ID
Your Cloudflare account ID is found in your dashboard URL.Log in to Cloudflare
Go to https://dash.cloudflare.com/login and sign in to your account.
Find your account ID
After logging in, you’ll be redirected to a URL like:The last part of the URL is your account ID.
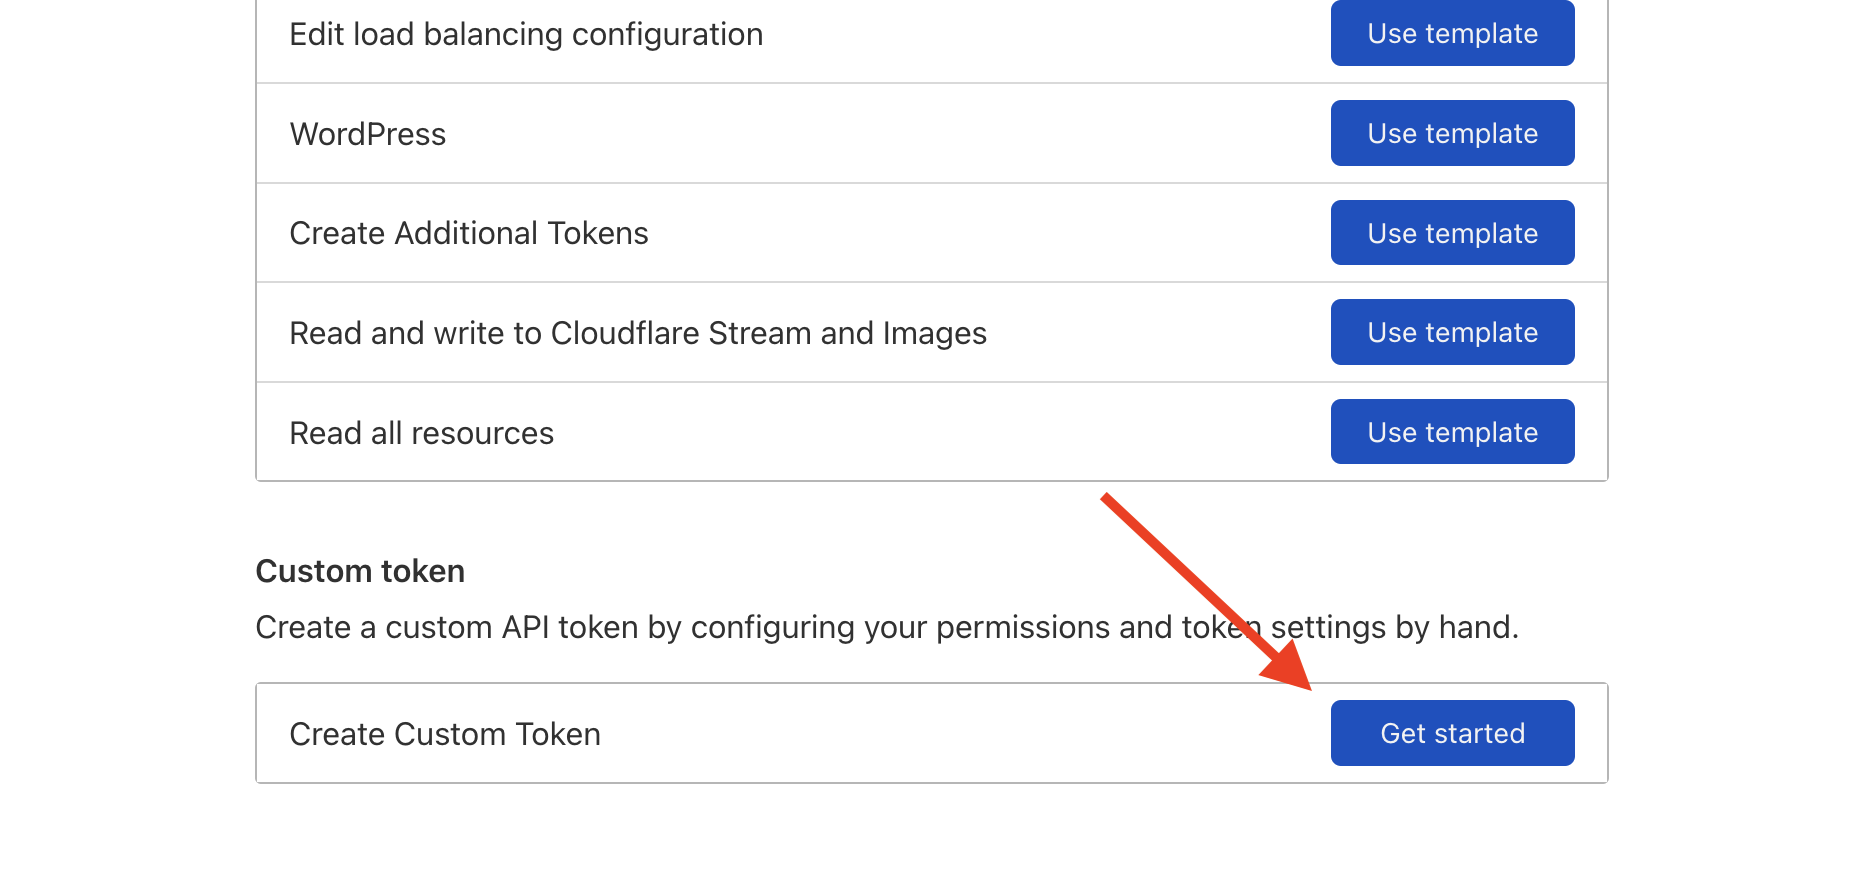
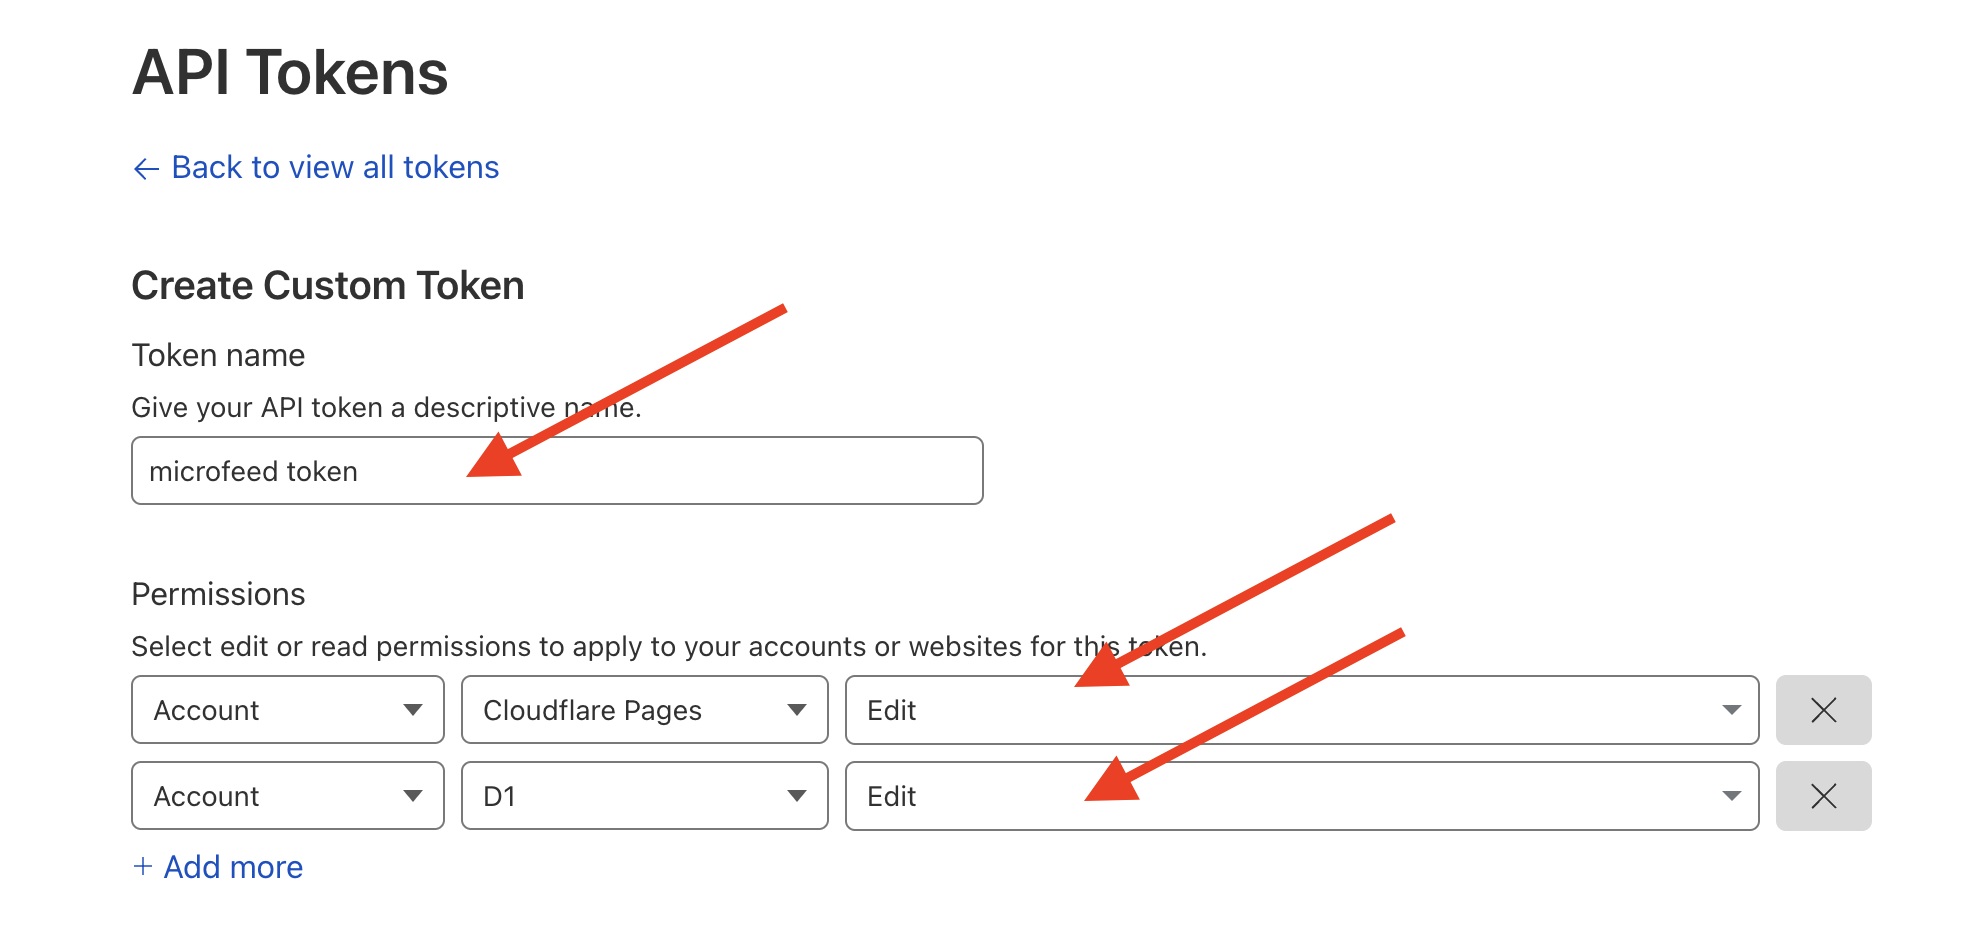
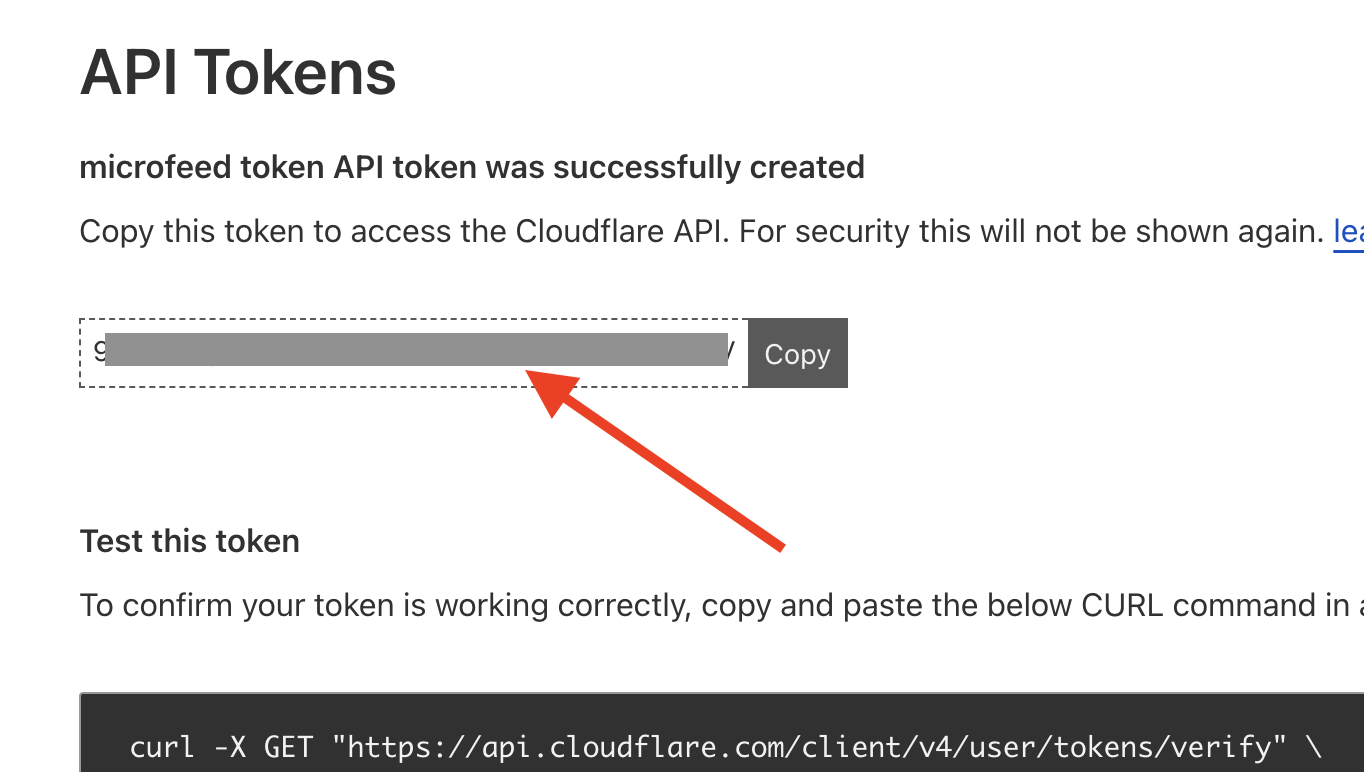
CLOUDFLARE_API_TOKEN
You need to create an API token with permissions for Cloudflare Pages and D1.Navigate to API tokens
R2_ACCESS_KEY_ID and R2_SECRET_ACCESS_KEY
These credentials allow microfeed to store and retrieve media files from Cloudflare R2.Navigate to R2 dashboard
Go to your R2 dashboard.
You may need to add a credit card to access R2, but you won’t be charged unless you exceed the very generous free quota (10GB storage + 10 million reads/month + 1 million writes/month).

Copy both credentials
After creating the token, you’ll see two values:
- Access Key ID: Copy this for
R2_ACCESS_KEY_ID - Secret Access Key: Copy this for
R2_SECRET_ACCESS_KEY
CLOUDFLARE_PROJECT_NAME
This is the name that will be used for your Cloudflare Pages project.Choose a project name
Pick a name using only these characters:
- Lowercase letters:
a-z - Uppercase letters:
A-Z - Numbers:
0-9 - Dashes:
-
Use your domain name
We recommend using your custom domain name with dots replaced by dashes.For example:
- Domain:
photos.mycustomdomain.com - Project name:
photos-mycustomdomain-com
Verify your secrets
After adding all five secrets, your GitHub Actions secrets page should look like this: