Installation Guide
This guide provides detailed instructions for setting up a complete development environment for Windows Calculator.System Requirements
Operating System
To check your Windows version:- Press
Win + R - Type
winverand press Enter - Verify you’re running Windows 11, build 22000 or higher
Hardware Requirements
- Processor: 1.8 GHz or faster multi-core processor
- RAM: 8GB minimum, 16GB recommended
- Disk Space: At least 10GB of free space
- Display: 1280 x 720 minimum resolution
Step-by-Step Installation
Install Visual Studio
Download and install the latest version of Visual Studio. The free Community edition is sufficient for Calculator development.Download Visual Studio:
- Visit Visual Studio Downloads
- Download Visual Studio 2022 or later
- Run the installer
Visual Studio Community is free for individual developers, open-source projects, academic research, education, and small professional teams.
Install Required Workloads
During Visual Studio installation (or by running the Visual Studio Installer later), ensure you install the following workload: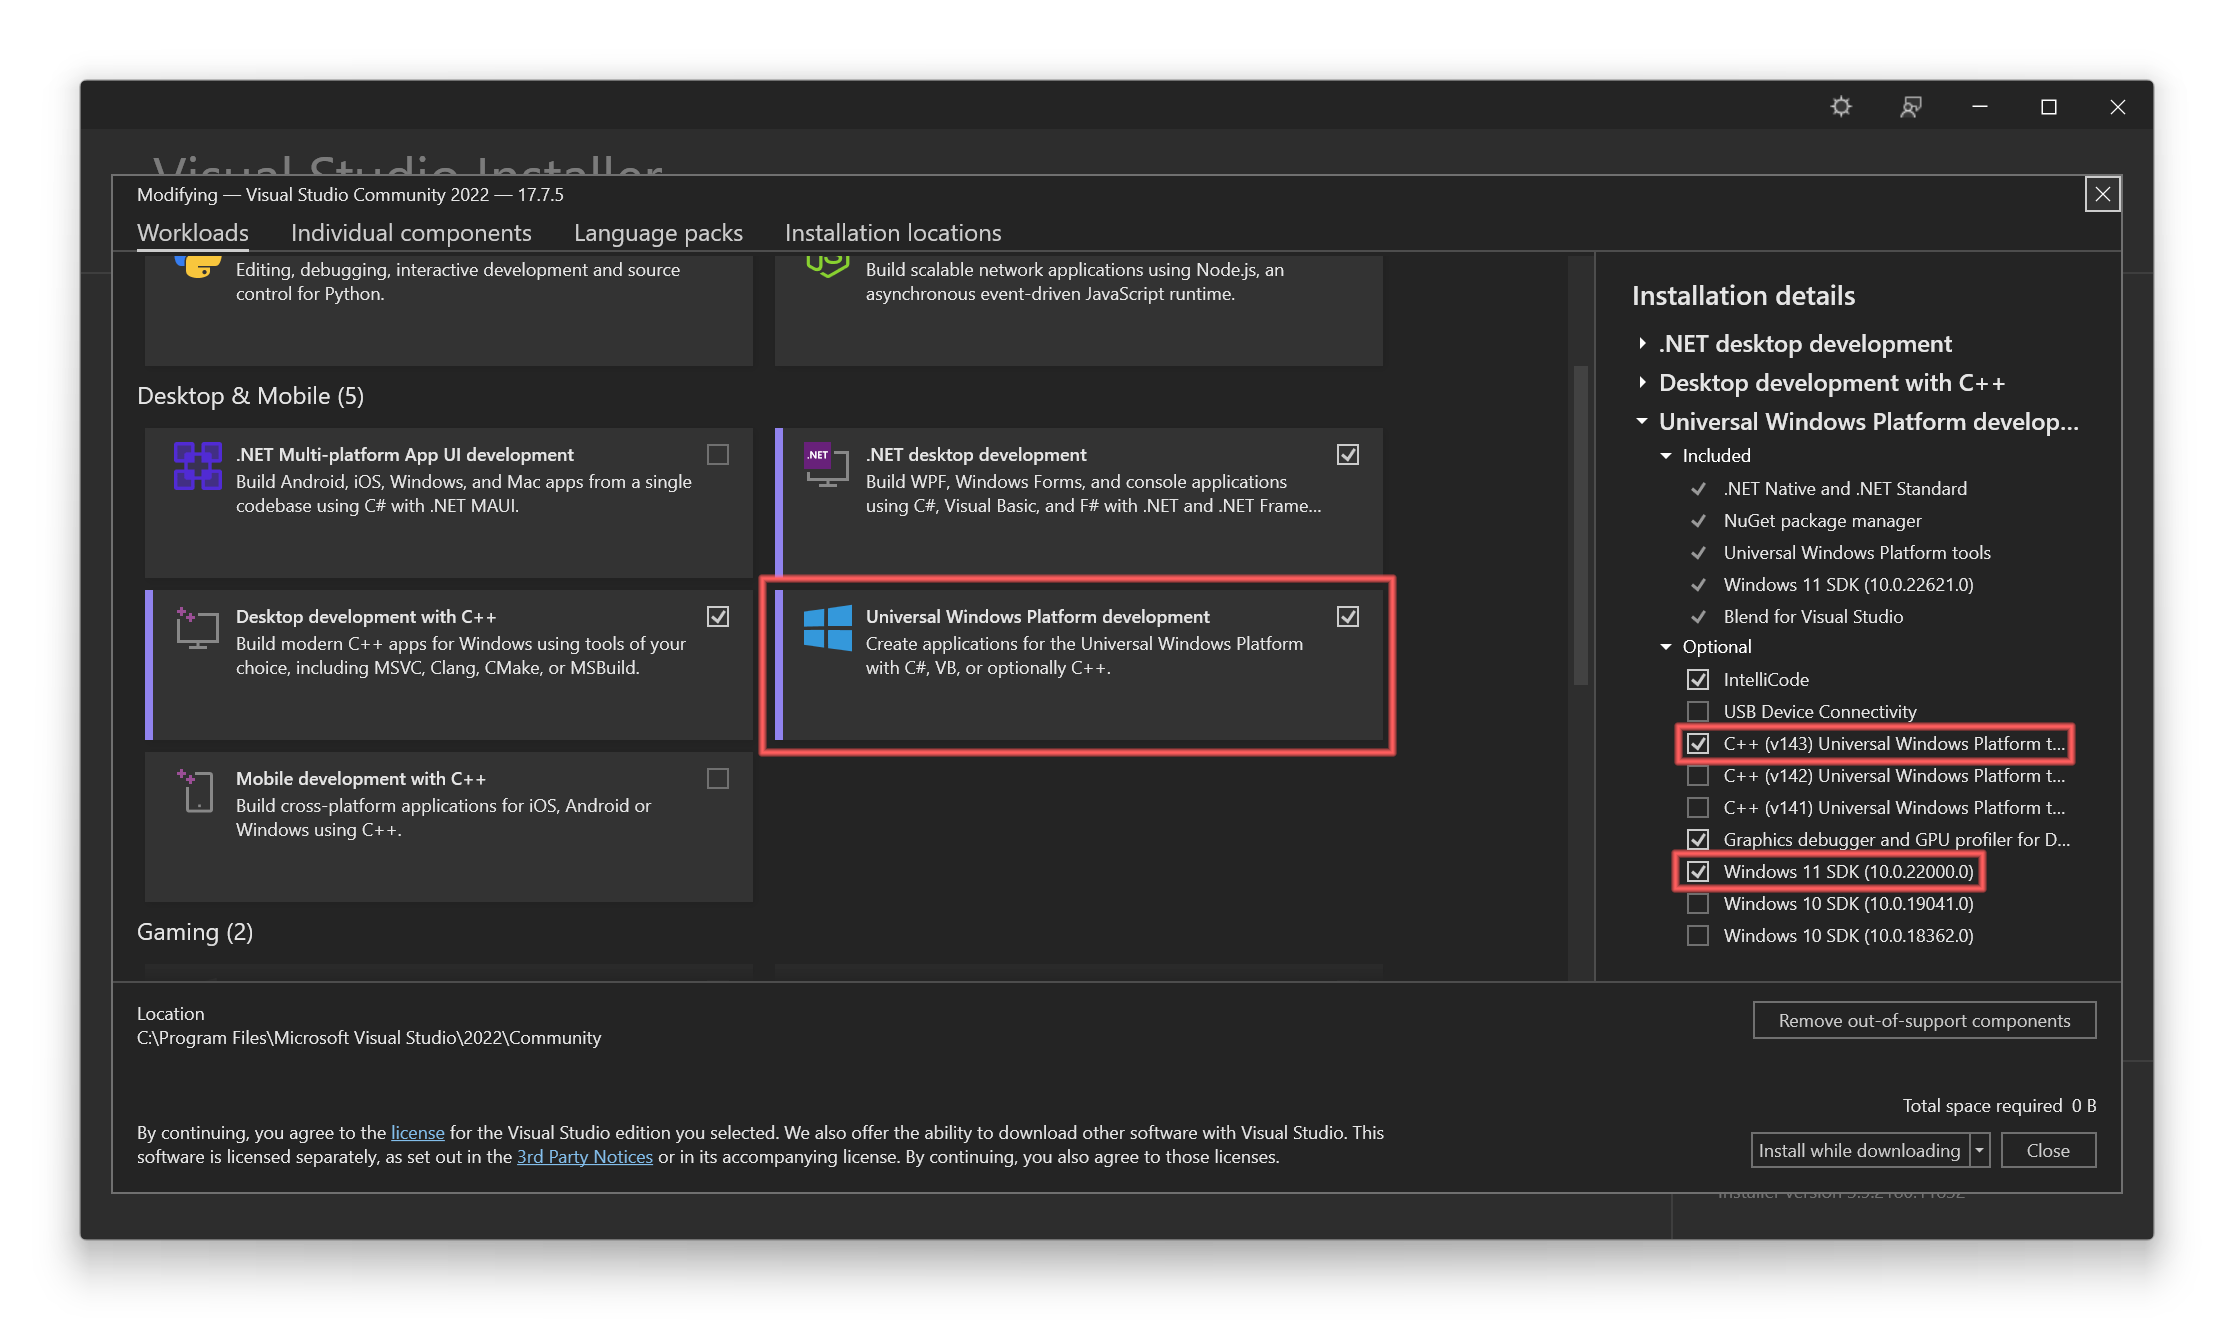
Universal Windows Platform Development
- In the Visual Studio Installer, select the Workloads tab
- Check Universal Windows Platform development
- In the Installation details panel on the right, ensure the following are selected:
- C++ Universal Windows Platform tools
- Windows 11 SDK (latest version)
Install Windows 11 SDK
The Windows 11 SDK should be installed as part of the UWP workload, but verify you have the latest version:
- In Visual Studio Installer, go to Individual components tab
- Search for “Windows 11 SDK”
- Select the latest Windows 11 SDK version available
- Click Modify to install
Calculator requires the latest Windows 11 SDK. If you have an older SDK version, update to the latest.
Install XAML Styler Extension
XAML Styler is a Visual Studio extension that formats XAML markup according to the project’s style guidelines.Install from Visual Studio:
- Open Visual Studio
- Go to Extensions → Manage Extensions
- Search for “XAML Styler”
- Click Download and restart Visual Studio to complete installation
- Visit XAML Styler on Visual Studio Marketplace
- Click Download
- Run the downloaded VSIX file
XAML Styler helps maintain consistent code formatting across the project. It’s essential for contributions that will be accepted.
Clone the Repository
Use Git to clone the Windows Calculator repository:If you plan to contribute, consider forking the repository first:Then add the upstream remote:
- Go to github.com/Microsoft/calculator
- Click the Fork button
- Clone your fork:
Open and Build the Solution
- Navigate to the cloned repository
- Open
src\Calculator.slnin Visual Studio - Wait for Visual Studio to load the solution and restore NuGet packages
- Select your build configuration:
- Configuration: Debug or Release
- Platform: x64, x86, or ARM64
- Build the solution:
- Press
F6orCtrl+Shift+B - Or from menu: Build → Build Solution
- Press
The first build may take 5-10 minutes depending on your system. Subsequent builds will be faster.
Optional: Install Windows Application Driver
To run UI tests, install Windows Application Driver (WinAppDriver):Download WinAppDriver
Visit the WinAppDriver releases page and download the latest MSI installer.
Verify Your Installation
After completing the installation, verify everything is set up correctly:Build Test
- Open
src\Calculator.slnin Visual Studio - Build the solution (F6)
- Verify the build completes without errors
Run Test
- Press F5 to run with debugging
- The Calculator app should launch
- Test basic functionality:
- Perform calculations in Standard mode
- Switch between different calculator modes
- Try the unit converter
Project Structure Overview
After cloning, you’ll see the following key directories:For a detailed explanation of the architecture, see the Application Architecture documentation.
Development Environment Configuration
Recommended Visual Studio Settings
- Enable XAML Hot Reload: Go to Tools → Options → Debugging → Hot Reload and enable XAML Hot Reload
- C++ Code Style: The project follows the C++ Core Guidelines
- Enable IntelliSense: Ensure IntelliSense is enabled for both C++ and C# files
Git Configuration
Configure Git with your information:Troubleshooting
Build Errors
“C++ tools not installed” If you see C++ compilation errors:- Open Visual Studio Installer
- Modify your installation
- Under “Universal Windows Platform development”, check “C++ Universal Windows Platform tools”
- Click Modify and wait for installation
- Check your internet connection
- Go to Tools → NuGet Package Manager → Package Manager Settings
- Click Clear All NuGet Cache(s)
- Rebuild the solution
Runtime Errors
“App failed to deploy” If the app fails to deploy:- Ensure Developer Mode is enabled in Windows Settings
- Go to Settings → Privacy & Security → For developers
- Turn on Developer Mode
Next Steps
Quick Start Guide
Jump into building and running the app
Architecture Overview
Understand the MVVM design and project structure
Contributing
Learn how to contribute to the project
Application Architecture
Deep dive into the technical architecture
Additional Resources
- C++/CX Documentation: Visual C++ Language Reference
- UWP Development: Universal Windows Platform Guide
- XAML Overview: XAML Platform
- MVVM Pattern: Data Binding and MVVM
If you encounter any issues not covered in this guide, please check the GitHub Issues or create a new issue for help.