Platform Support
Patrol supports:- iOS 13 and newer
- Both physical devices and simulators
- iOS-specific native interactions
- iPhone and iPad devices
Patrol requires iOS 13 or higher. Make sure your deployment target in Xcode is set to at least iOS 13.0.
Setup Requirements
Before testing on iOS, ensure you have the following installed:macOS with Xcode
Patrol iOS testing requires:
- macOS (iOS development is only supported on macOS)
- Xcode 13.0 or newer
CocoaPods
Patrol uses CocoaPods for iOS dependencies. Install if not already present:Verify installation:
Native Integration
To enable Patrol’s native automation on iOS, you need to configure your app’s test infrastructure in Xcode.Create UI Test Target
If you don’t have a UI test target: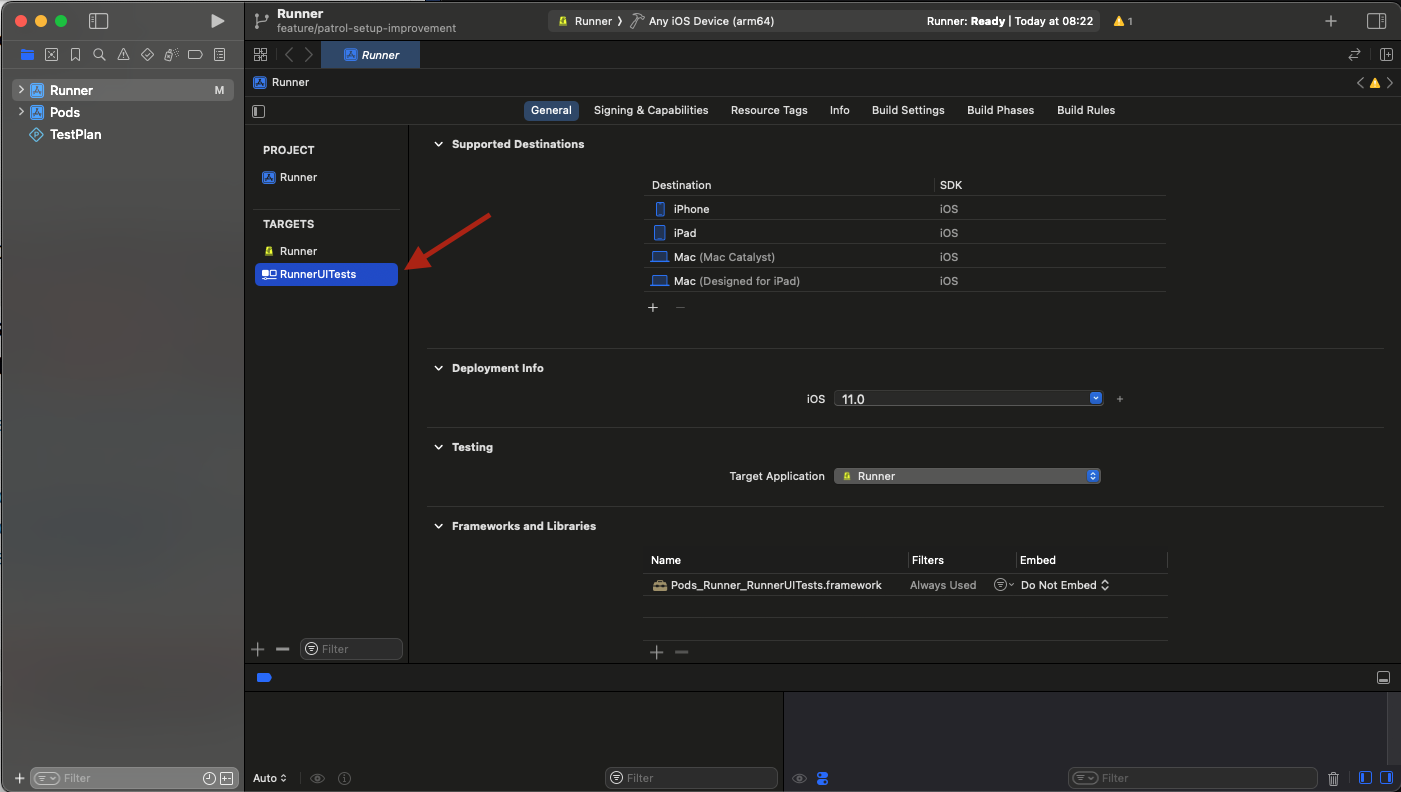
- Select File > New > Target…
- Choose UI Testing Bundle
- Set Product Name to
RunnerUITests - Set Organization Identifier to match Runner’s identifier
- Set Target to be Tested to
Runner - Set Language to
Objective-C - Click Finish
Delete Unnecessary Files
Delete
RunnerUITestsLaunchTests.m through Xcode (right-click > Move to Trash).Set Deployment Target
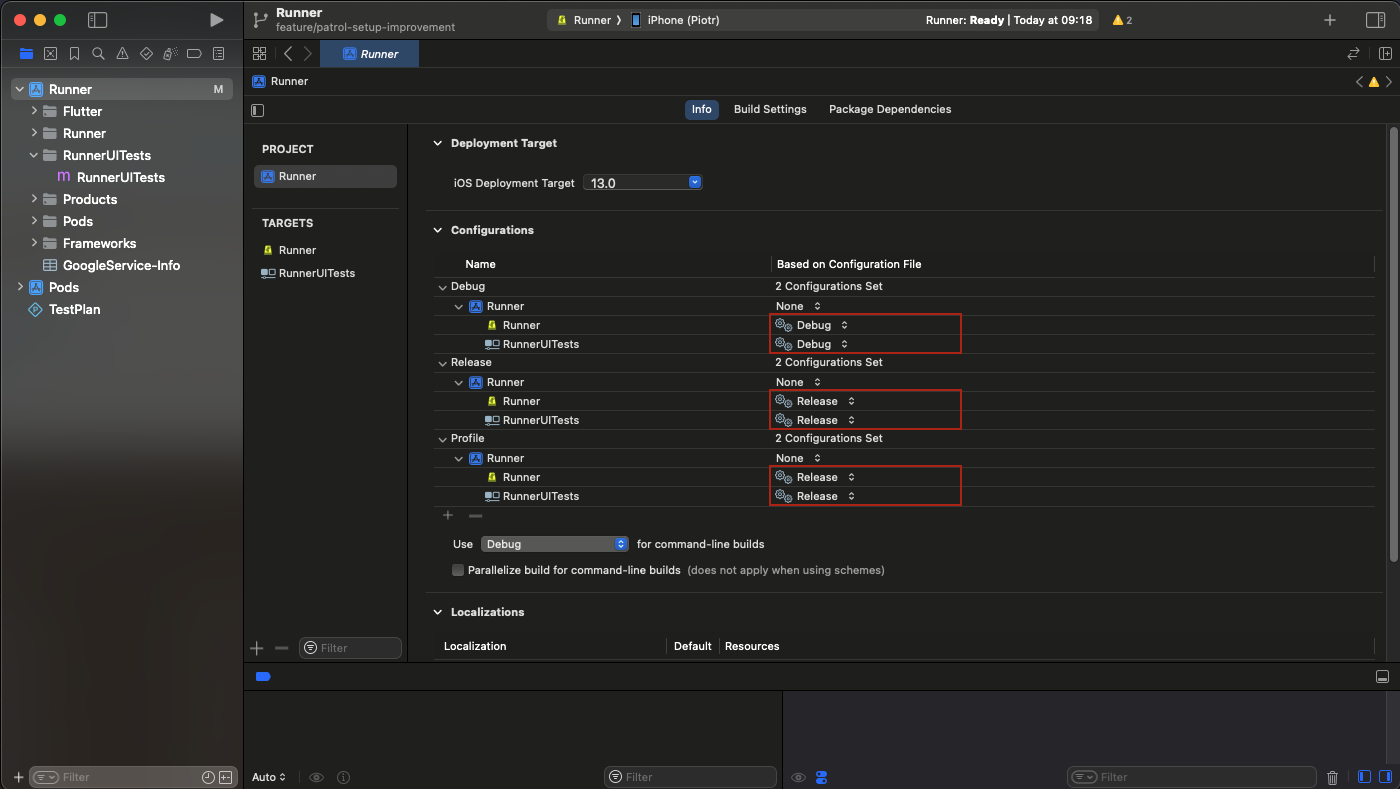
Ensure 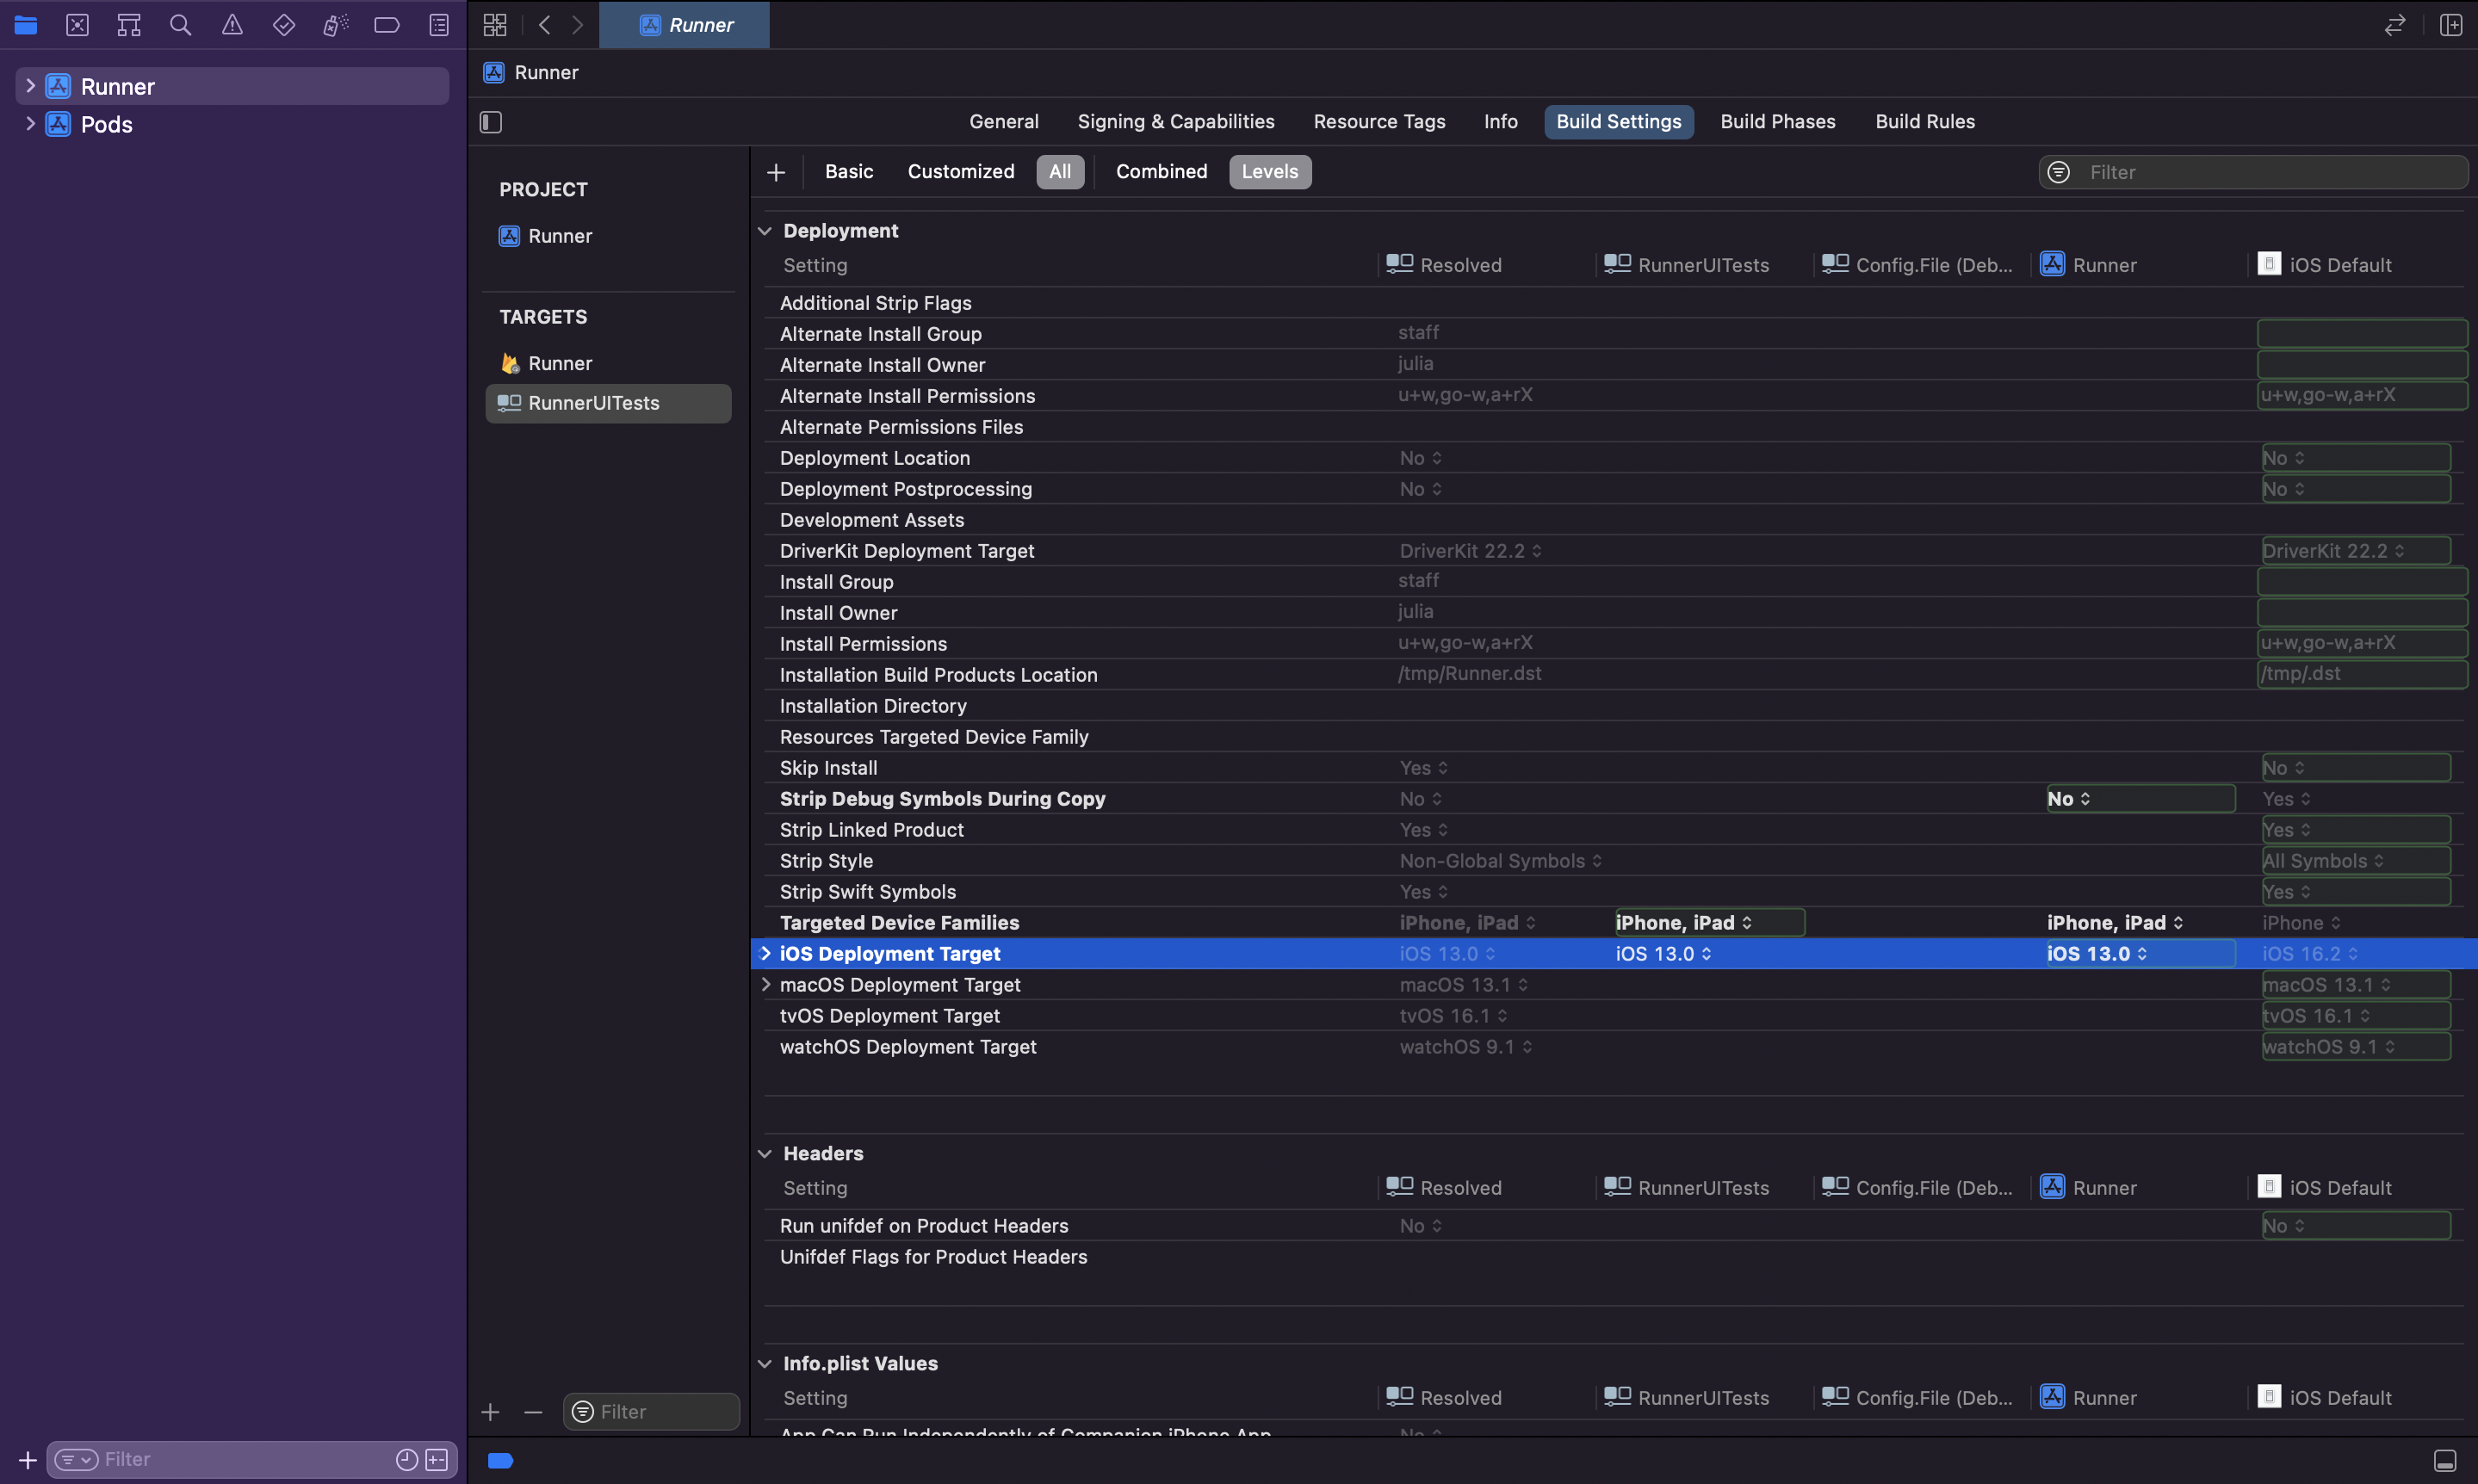
RunnerUITests deployment target matches Runner:- Select
RunnerUITeststarget - Go to Build Settings
- Search for iOS Deployment Target
- Set to same version as
Runner(minimum iOS 13.0)
Configure RunnerUITests.m
Replace the contents of
ios/RunnerUITests/RunnerUITests.m:ios/RunnerUITests/RunnerUITests.m
Configure Build Phases
In Xcode, select 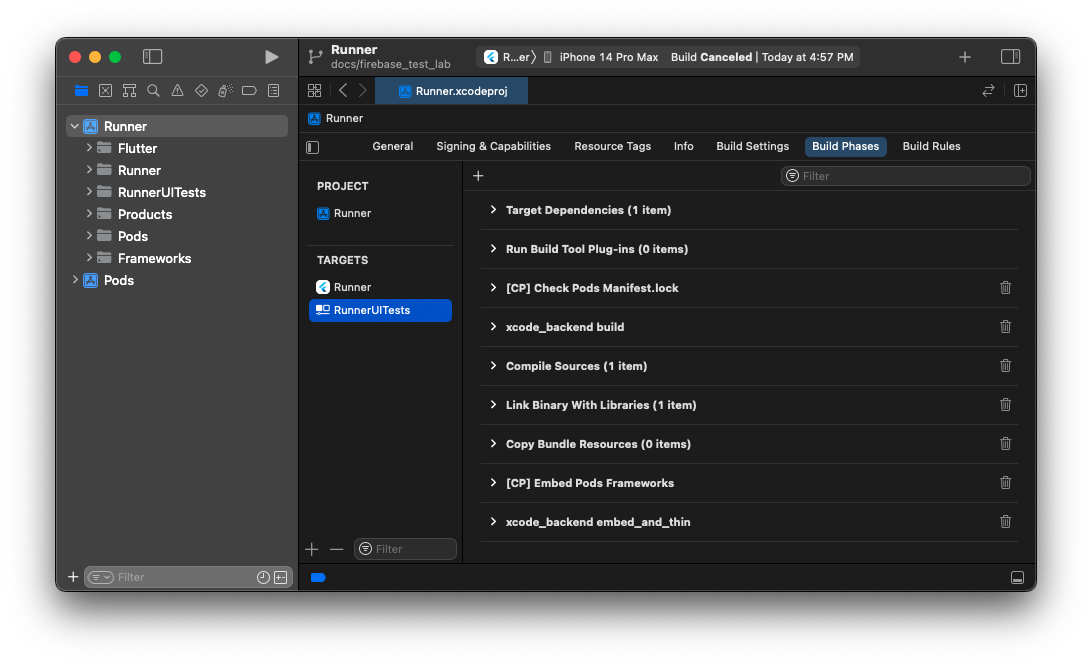
RunnerUITests target:- Go to Build Phases
- Click + > New Run Script Phase (add 2 phases)
- Name them:
xcode_backend buildxcode_backend embed_and_thin
- Arrange in this order:
- Dependencies
- xcode_backend build
- Compile Sources
- xcode_backend embed_and_thin
- Link Binary With Libraries
Add Build Scripts
Add scripts to the build phases:xcode_backend build:xcode_backend embed_and_thin:
Disable Parallel Execution
Critical: Disable parallel execution in Xcode:
- Select Product > Scheme > Edit Scheme…
- Go to Test tab
- Uncheck Execute in parallel
- Repeat for all schemes if you have multiple
Disable User Script Sandboxing
- Select
RunnerUITeststarget - Go to Build Settings
- Search for User Script Sandboxing
- Set to No
Running Tests
On Simulator
Start an iOS simulator and run your tests:On Physical Device
Testing on physical iOS devices requires additional setup. See the Physical Devices page for detailed instructions.Physical device testing requires proper code signing and provisioning profiles configured in Xcode.
iOS-Specific Features
Patrol provides iOS-specific automation through$.platform.ios:
UI Interactions
Gestures
Notifications
Camera & Gallery
WebView Interactions
iOS Selectors
UseIOSSelector to target native iOS views:
Capabilities
iOS platform features available through$.platform.mobile (cross-platform) and $.platform.ios (iOS-only):
| Feature | Status |
|---|---|
| Press home | ✅ |
| Open app | ✅ |
| Open notifications | ✅ |
| Close notifications | ✅ |
| Open quick settings | ✅ (Control Center) |
| Open URL | ✅ |
| Enable/disable dark mode | ✅ |
| Enable/disable airplane mode | ✅ |
| Enable/disable cellular | ✅ |
| Enable/disable Wi-Fi | ✅ |
| Enable/disable Bluetooth | ✅ |
| Press volume up/down | ✅ (physical devices only) |
| Handle permission dialogs | ✅ |
| Set mock location | ✅ |
| Tap native views | ✅ |
| Enter text | ✅ |
| Swipe | ✅ |
| Pull to refresh | ✅ |
| Tap on notifications | ✅ |
| Close heads-up notification | ✅ |
| Camera & gallery | ✅ |
| WebView interaction | ✅ |
For a complete feature parity comparison across all platforms, see the Feature Parity page.
Limitations
Volume Buttons
Simulator Permissions
Some permissions behave differently on simulators:- Location services can be mocked on simulators
- Camera access uses a simulated camera
- Push notifications work differently than on physical devices
Code Signing
Physical device testing requires:- Valid Apple Developer account
- Proper provisioning profiles
- Code signing configuration for both
RunnerandRunnerUITeststargets
Troubleshooting
Simulator Cloning
If simulators are being cloned when running tests: Watch this video for instructions.Test Stops at “Wait for com.example.myapp to idle”
-
Search for
FLUTTER_TARGETin your Xcode project files -
Remove
FLUTTER_TARGET(both key and value) from:*.xcconfigfiles*.pbxprojfiles
-
Regenerate configuration:
Real App Opens Instead of Test
This is also caused by incorrectFLUTTER_TARGET configuration:
- Remove
FLUTTER_TARGETfrom all Xcode configuration files - Regenerate with the Flutter build command above
Build Fails with Deployment Version Mismatch
-
Check
ios/Podfilehas the correct platform version: -
Verify all targets have matching deployment targets:
- Select each target in Xcode
- Go to Build Settings
- Search for iOS Deployment Target
- Ensure all match the Podfile version
Pod Install Fails
Next Steps
Physical Devices
Set up testing on physical iOS devices
Feature Parity
See all available iOS features
Write Your First Test
Start writing Patrol tests
Android Platform
Testing on Android devices