Overview
While Steps 1-4 automate the build environment setup, Step 5 requires some manual configuration within Xcode itself. These steps ensure the Xcode project correctly references the compiled libraries and is configured for development.Opening the Project
Locate the Xcode project
The Xcode project is located in your Miele-LXIV source directory:Replace
x.x.x with your actual version number.Select the miele-lxiv scheme
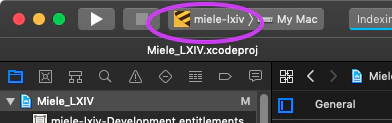
In Xcode’s toolbar:
- Click the scheme dropdown (next to the Run/Stop buttons)
-
Select “miele-lxiv”
Update Dynamic Libraries
The Xcode project needs to reference the correct versions of dynamic libraries from yourBinaries directory.
Remove old library references
In the Xcode project navigator, locate and delete the following 4 files (shown in red):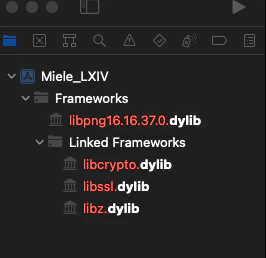
- Old libpng dylib reference
- Old libtiff dylib reference
- Old libjpeg dylib reference
- Old libcrypto dylib reference
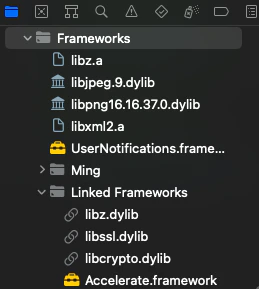
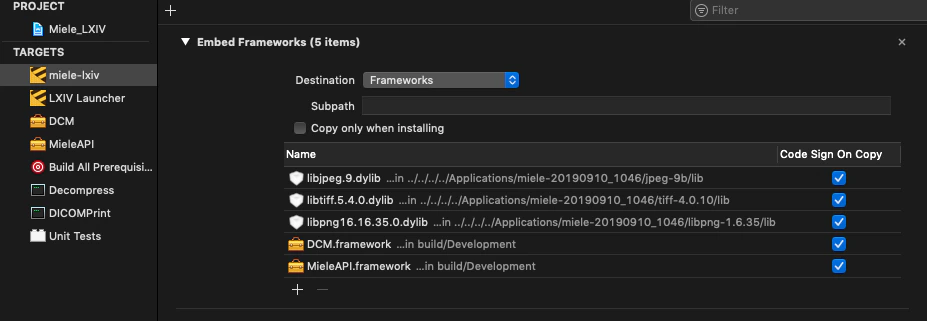
Add updated libraries
Drag and drop the following library files from Finder into your Xcode project:For targets: miele-lxiv AND Decompress
Binaries/libpng/lib/libpng16.16.37.0.dylibBinaries/libtiff/lib/libtiff.5.4.0.dylib
Binaries/libjpeg/lib/libjpeg.9.dylibBinaries/openssl-1.1.1d/lib/libcrypto.dylib
Binaries/libxml2/lib/libxml2.a
Binaries/zlib/lib/libz.a
Binaries/zlib/lib/libz.dylib
When dragging files, Xcode will ask about target membership. Ensure you select the correct targets as listed above.
Fix Compiler Issues
Update MACOSX_DEPLOYMENT_TARGET
Change deployment target
The project needs to target macOS 10.13 or later:
- Select the Miele_LXIV project in the navigator
- For each target (miele-lxiv, MieleAPI, Decompress, DICOMPrint, etc.)
- Go to Build Settings
- Search for “macOS Deployment Target”
- Change from 10.9 to 10.13
You’ll need to update this in approximately 8 places (once per target).
Fix NSObject Parameter Initialization
Modern Objective-C compilers require explicit observer parameters instead of usingself as a class.
Edit WebPortal.mm
Make the following changes:Line 133 - Change:to:Line 138 - Change:to:Line 142 - Change:to:Lines 143-157 - Change all instances of:to:
Update Linker Flags
Modern versions require additional WebP libraries:Additional Configuration (Optional)
GLEW Python Issue
GLEW Python Issue
If you encountered a “python: command not found” error during GLEW setup:
Verify miele-lxiv-lite.zip exists
Verify miele-lxiv-lite.zip exists
Ensure
Binaries/miele-lxiv-lite.zip exists in the project. This is needed for certain build phases.Build and Test
Build the project
Go to Product → Build (or press Cmd+B)The build should complete without errors. Watch for warnings but they’re usually not critical.
Command Line Build (Alternative)
You can also build from the command line:Troubleshooting
Library not found errors
Library not found errors
- Verify symbolic links in the Binaries directory point to the correct locations
- Check that you added the correct dylib versions (version numbers must match)
- Ensure target membership is set correctly for each library
Compiler errors in WebPortal or DicomDatabase
Compiler errors in WebPortal or DicomDatabase
Double-check that you made ALL the observer parameter changes listed above. Missing even one will cause compiler errors.
Linker errors about missing symbols
Linker errors about missing symbols
- Ensure you added both
/usr/local/lib/libwebp.aAND/usr/local/lib/libsharpyuv.ato Other Linker Flags - Verify all the collapsed libraries (libDCMTK.a, libVTK.a, libITK.a) were created in Step 3
Conclusion
Congratulations! You’ve successfully configured the Miele-LXIV Xcode project. You can now:- Build the application from Xcode
- Make modifications to source files
- Start your development cycle
- Build from command line if preferred
Next: Development Workflow
Learn about the typical development workflow for Miele-LXIV