docs.json configuration however you want.
This headless approach is useful when you need full control over your documentation’s design, layout, or behavior—for example, to match an existing design system or embed documentation into a larger site. You still get Mintlify’s publishing, search, MDX components, and AI features.
The @mintlify/astro integration reads your docs.json config and MDX content at build time, then processes everything into a format that Astro can render. Build your own layouts, components, and styles on top of it.
This guide walks you through setting up a headless Mintlify project with the starter template and getting it running locally.
Prerequisites
- A Mintlify account
- A GitHub account
- Node.js v20.17.0 or later (LTS versions recommended)
- Familiarity with Astro
Set up your project
Create a repository from the starter template
Navigate to the mintlify-astro-starter repository on GitHub and click Use this template to create a new repository on your account.Clone the repository to your local machine.
Sign up for Mintlify
If you don’t have a Mintlify account, sign up at app.mintlify.com/signup.
Install the GitHub app
On the Git settings page of your Mintlify dashboard, install the Mintlify GitHub app. If you already have the app installed, uninstall it and reinstall it so that you are ready to connect your new repository.
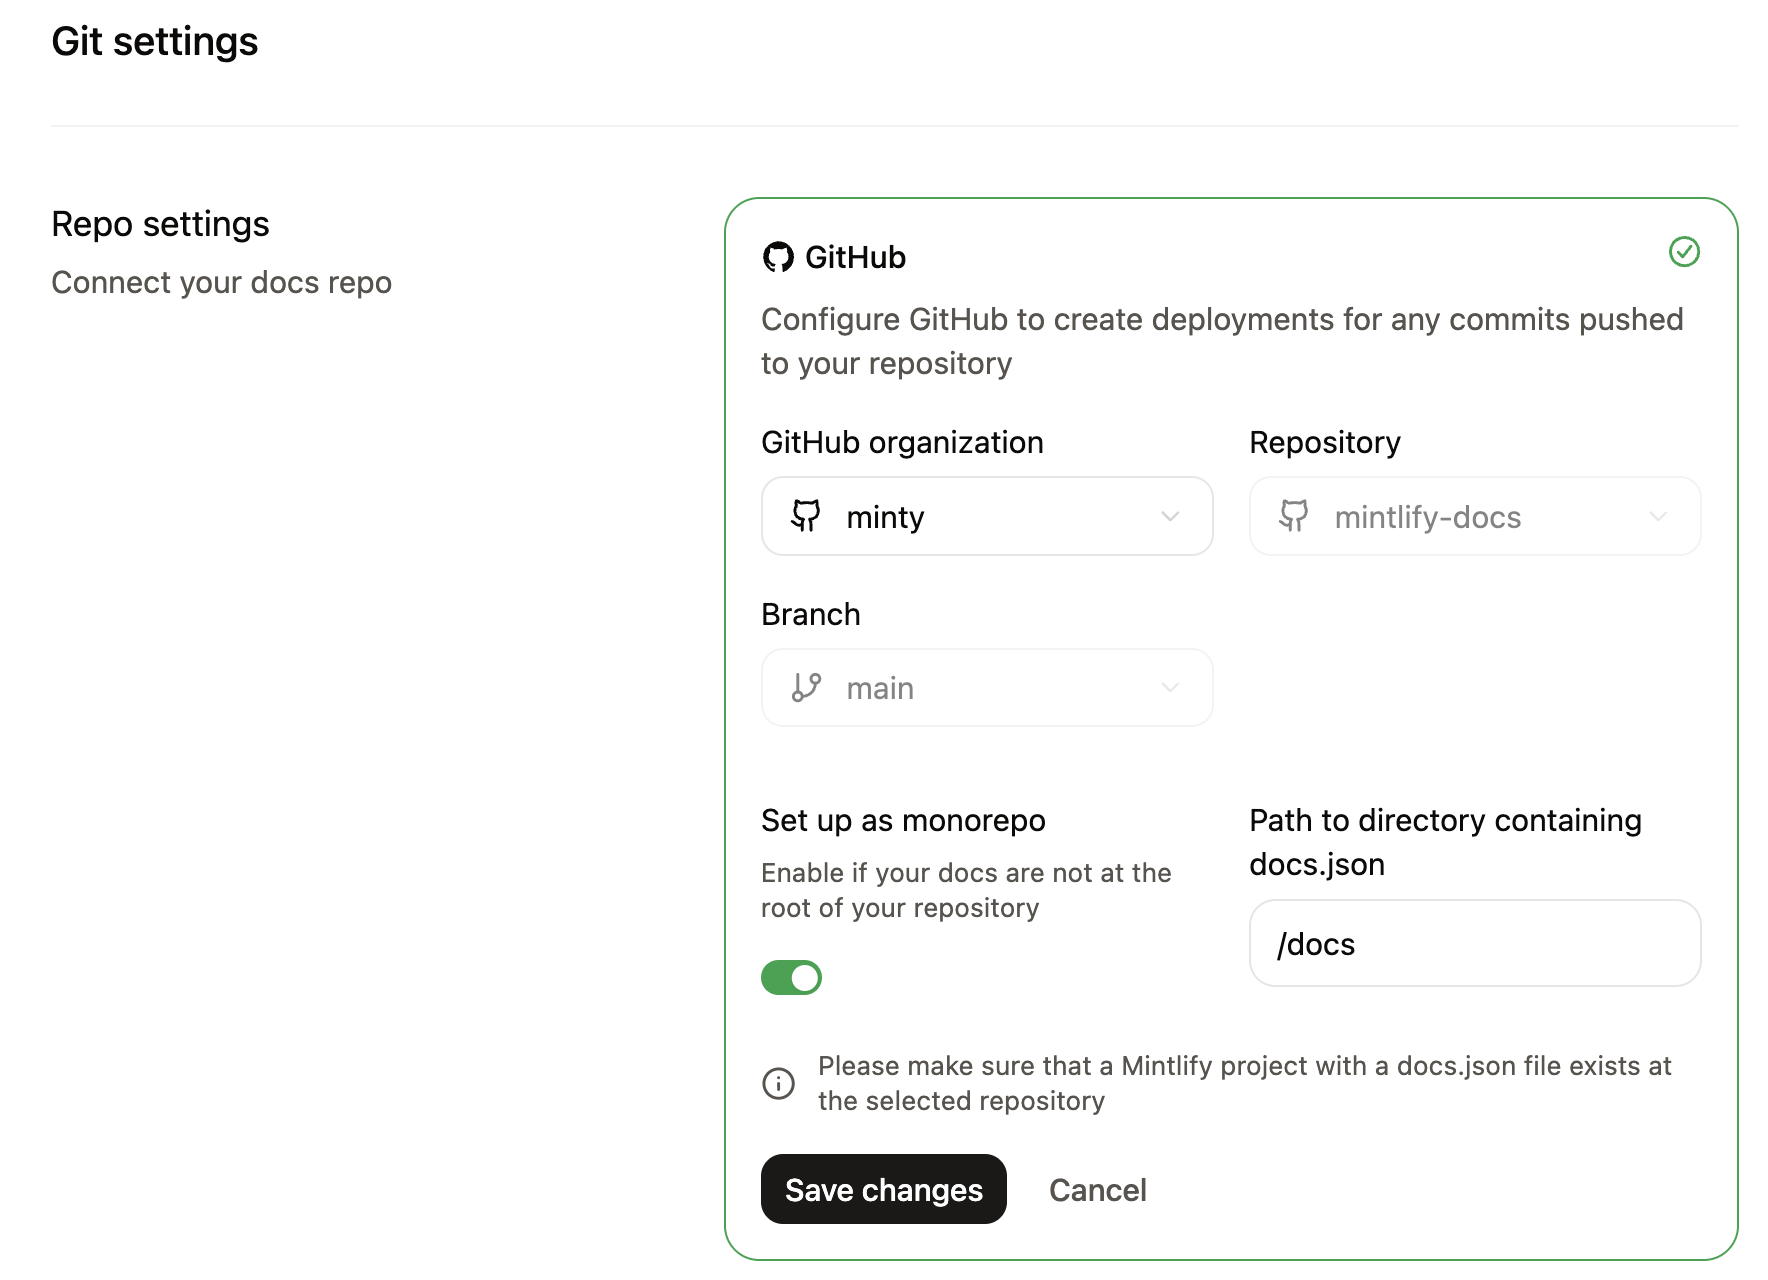
Connect your repository
- On the Git settings page, select the repository you created from the starter template.
- Enable the Set up as monorepo toggle.
- Enter
/docsas the path to the directory containing yourdocs.jsonfile. - Click Save changes.
Configure environment variables
Clone your new repository locally and create a Your subdomain is the domain name of your project. It is the part of your dashboard URL after the organization name. For example, if your dashboard URL is
.env file at the project root with your Mintlify credentials:.env
https://app.mintlify.com/org-name/domain-name, your subdomain is domain-name.Generate an assistant API key on the API keys page of your dashboard. The assistant API key starts with mint_dsc_.How it works
The integration connects three parts: the Astro build system, your content in thedocs/ directory, and the Mintlify packages that process and render that content.
Astro configuration
Configure themintlify() integration in astro.config.mjs with the path to your docs directory:
astro.config.mjs
docs.json and MDX files from the docsDir path and processes them into .mintlify/docs/, where Astro’s content collections pick them up.
Content structure
Your documentation content lives in thedocs/ directory, structured the same way as any other Mintlify project:
Routing and navigation
A catch-all route renders each MDX page. The@mintlify/astro/helpers package provides functions to resolve navigation state from your docs.json.
resolvePageData(): Returns tabs, sidebar navigation, footer links, and anchors for a given page path.unwrapNav(): Flattens the navigation tree into a list for sidebar rendering.
Layouts and styling
You control the full presentation layer. The starter template includes layouts, a sidebar, table of contents, and styles built with Tailwind CSS, but you can replace any of these with your own. Key files to customize:| File | Purpose |
|---|---|
src/layouts/Layout.astro | Root HTML layout |
src/pages/[...slug].astro | Page template and data loading |
src/components/Header.astro | Site header |
src/components/Sidebar/ | Sidebar navigation |
src/components/TableOfContents.tsx | On-page table of contents |
src/styles/ | Global styles, typography, and color scheme |
Connect search and assistant
The starter template includes search and assistant components that connect to Mintlify’s APIs using the environment variables you configure during setup.- Search: The
SearchBarcomponent insrc/components/SearchBar.tsxqueries the Mintlify search API. - Assistant: The
Assistantcomponent insrc/components/Assistant/provides an AI chat interface that answers questions using your documentation content.
PUBLIC_MINTLIFY_SUBDOMAIN and PUBLIC_MINTLIFY_ASSISTANT_KEY environment variables.
Next steps
After setting up your project:- Replace the starter content in
docs/with your own MDX files anddocs.jsonconfiguration. - Customize layouts and styles to match your design system.
- Deploy your Astro site to your preferred hosting provider.