- Mintlify uses access tokens to pull information from GitLab.
- GitLab uses webhooks to notify Mintlify when changes are made, enabling preview deployments for merge requests.
Set up the connection
1
Find your project ID
In your GitLab project, navigate to Settings > General and locate your Project ID.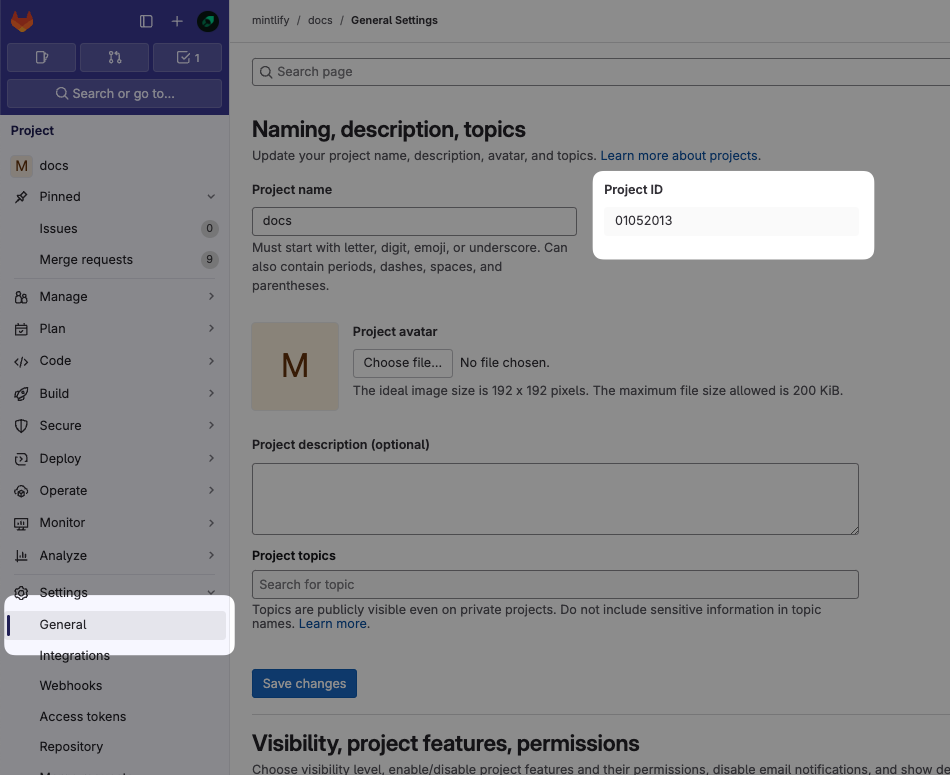
2
Generate an access token
Navigate to Settings > Access Tokens and select Add new token.Configure the token with these settings: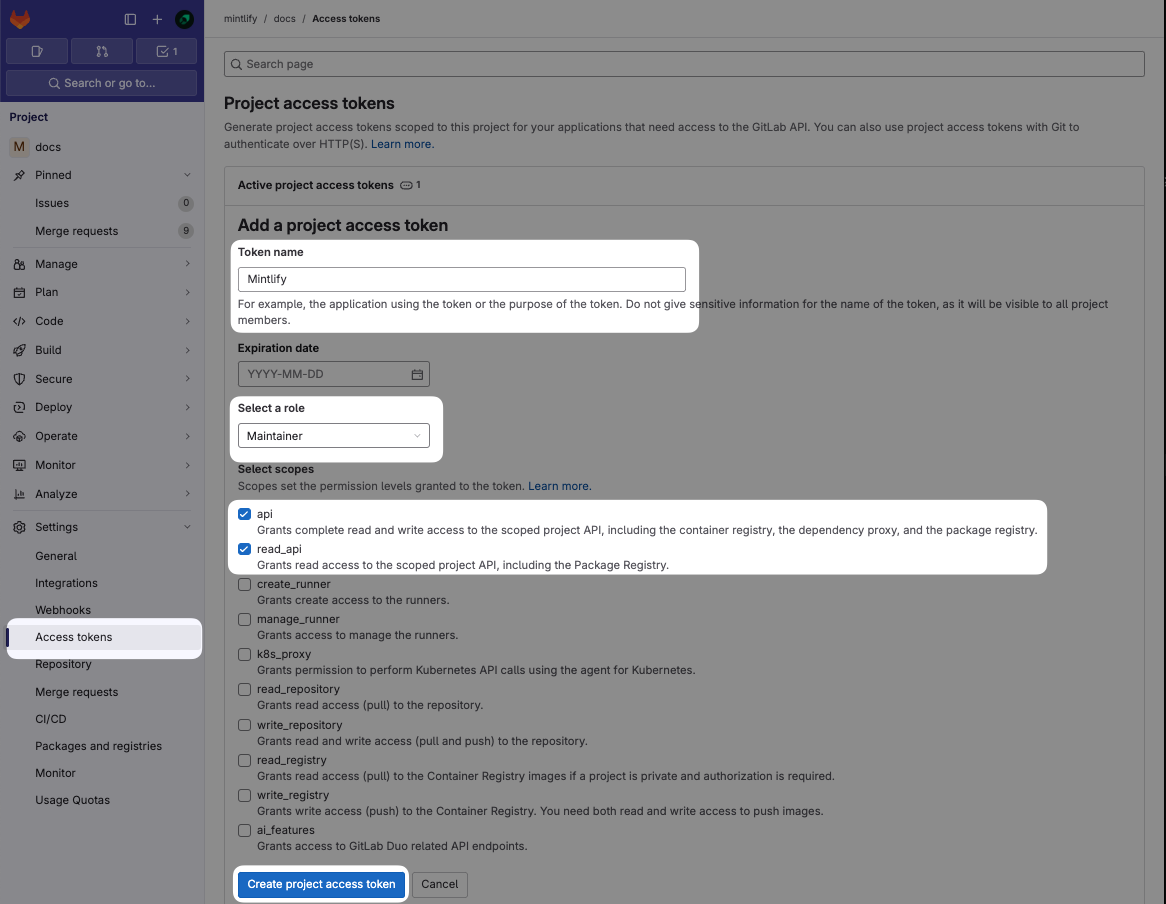
- Name: Mintlify
- Role: Maintainer (required for private repos)
- Scopes:
apiandread_api
If Project Access Tokens are not available, you can use a Personal Access Token instead. Note that Personal Access Tokens expire and must be updated.
3
Set up the connection
In the Mintlify dashboard: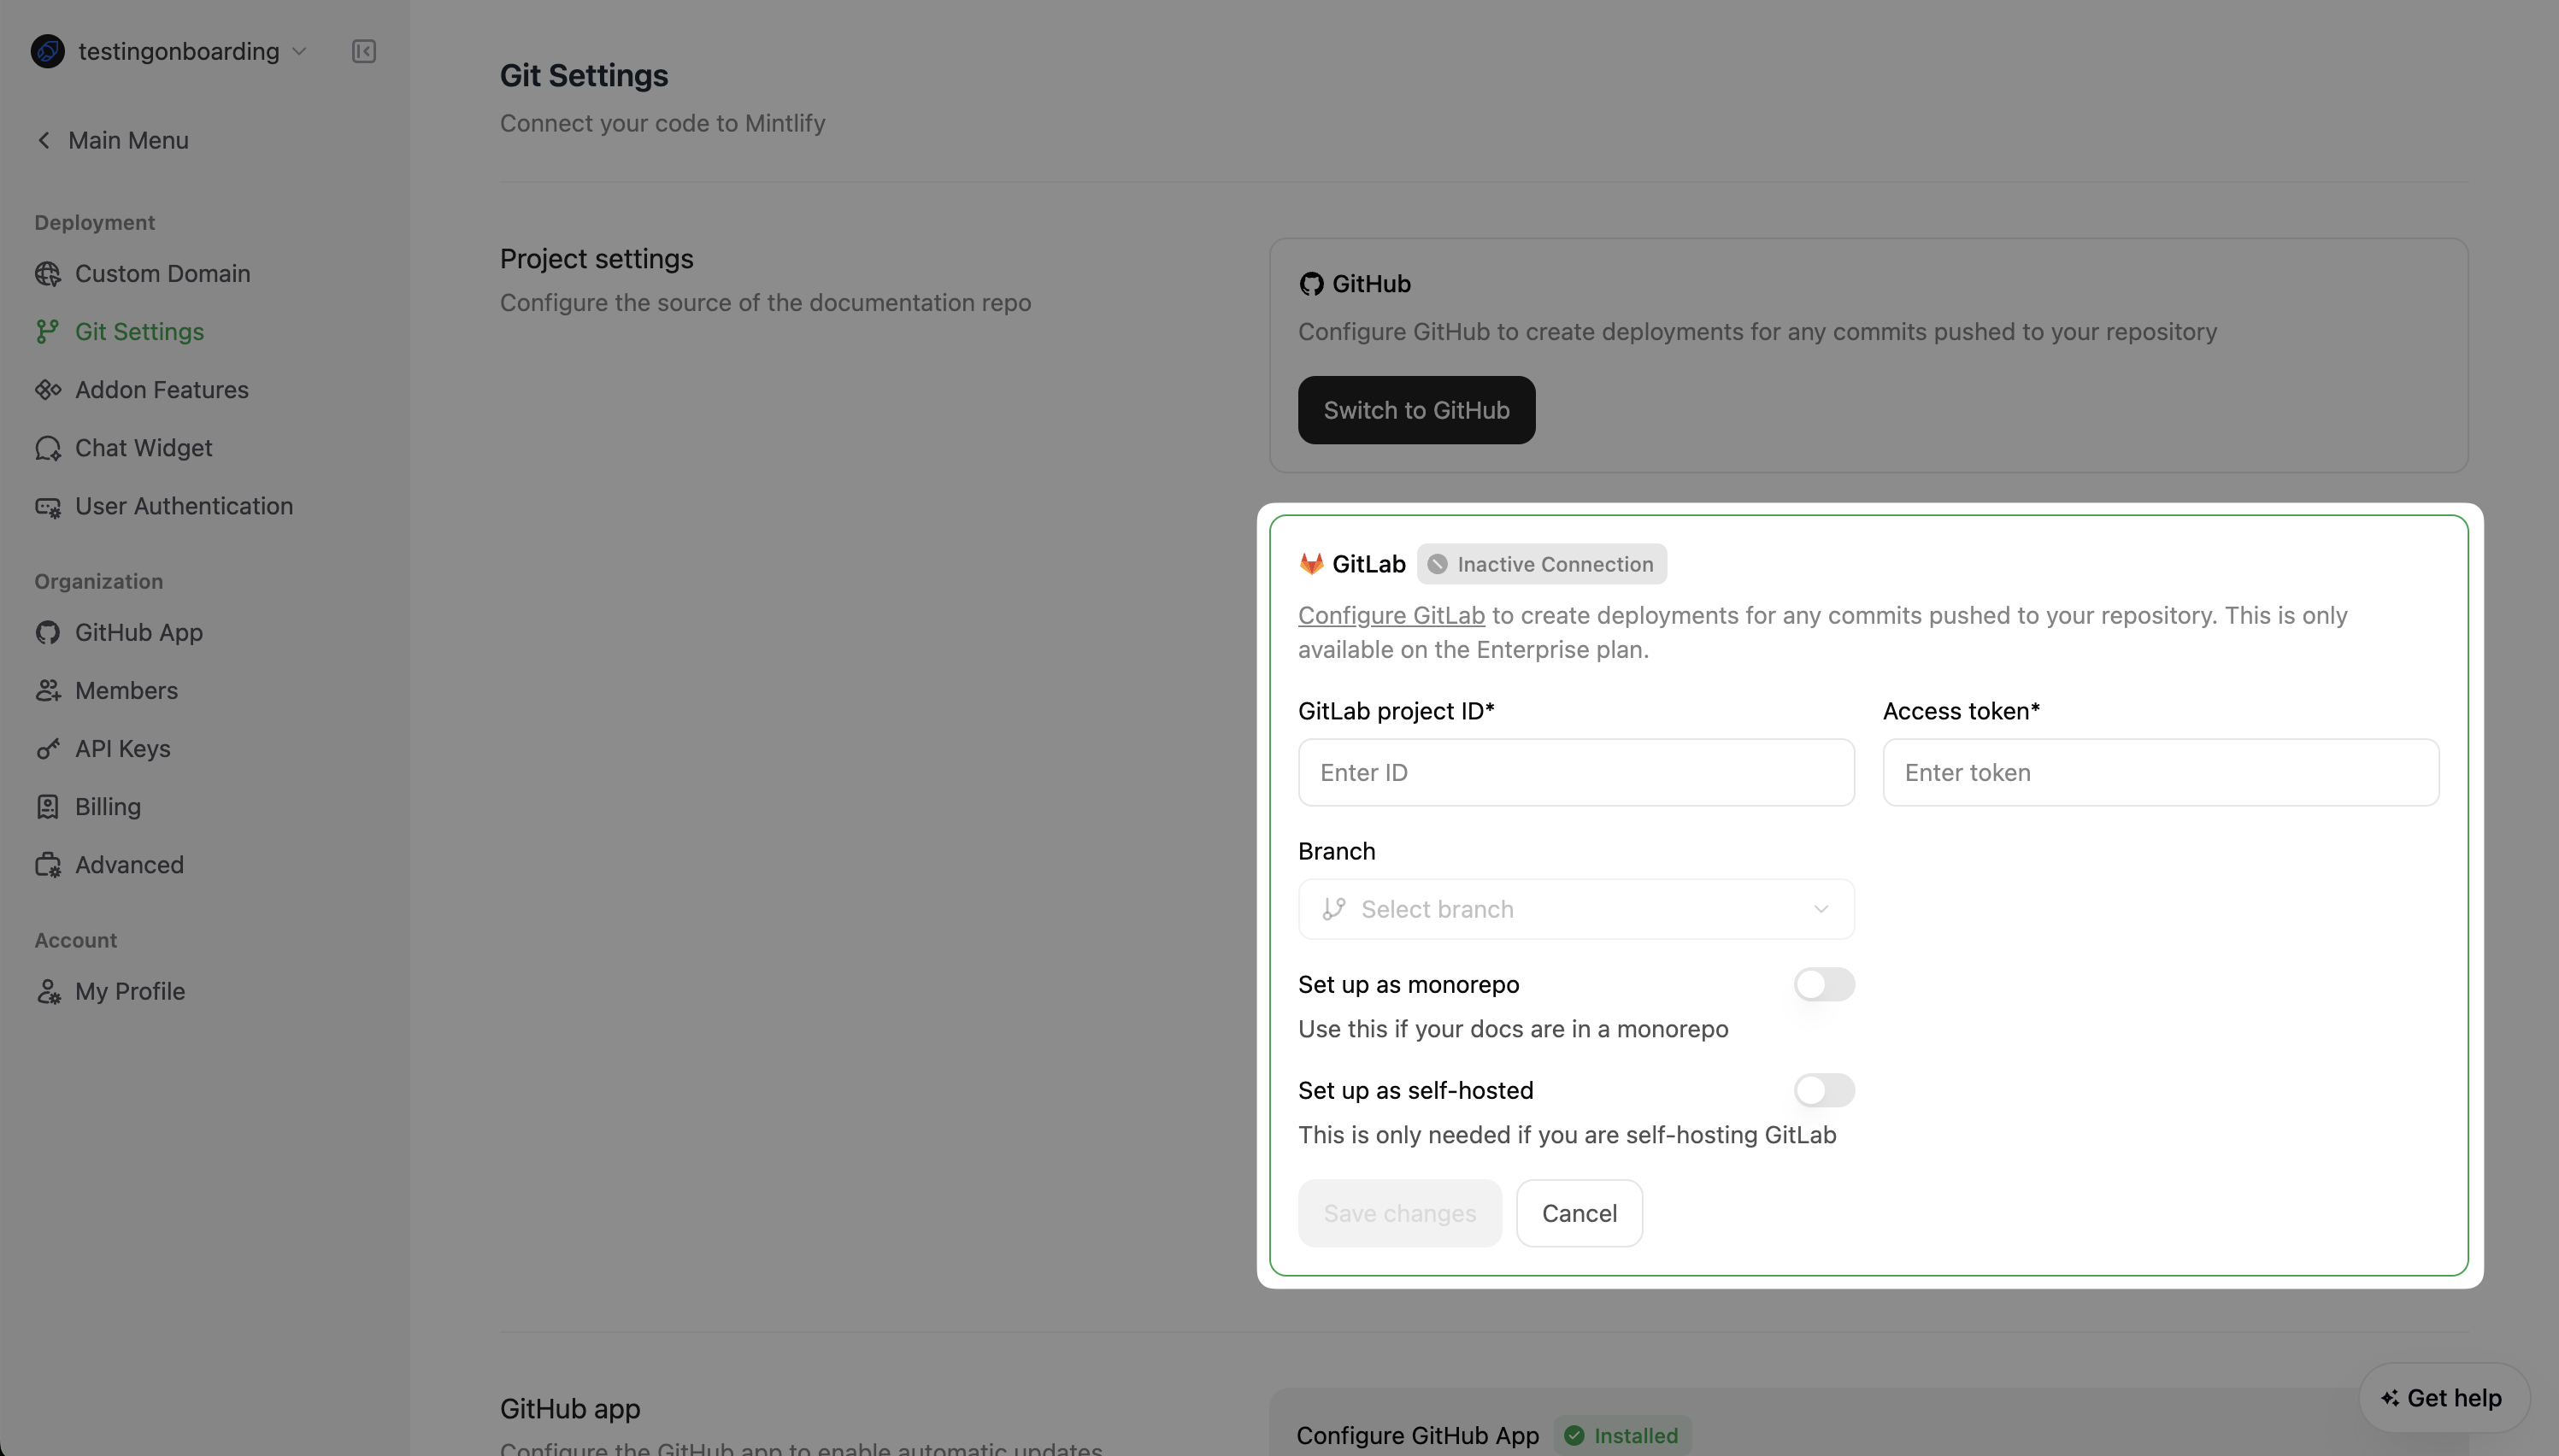
- Enter your project ID and access token.
- Complete any other required configurations.
- Click Save Changes.
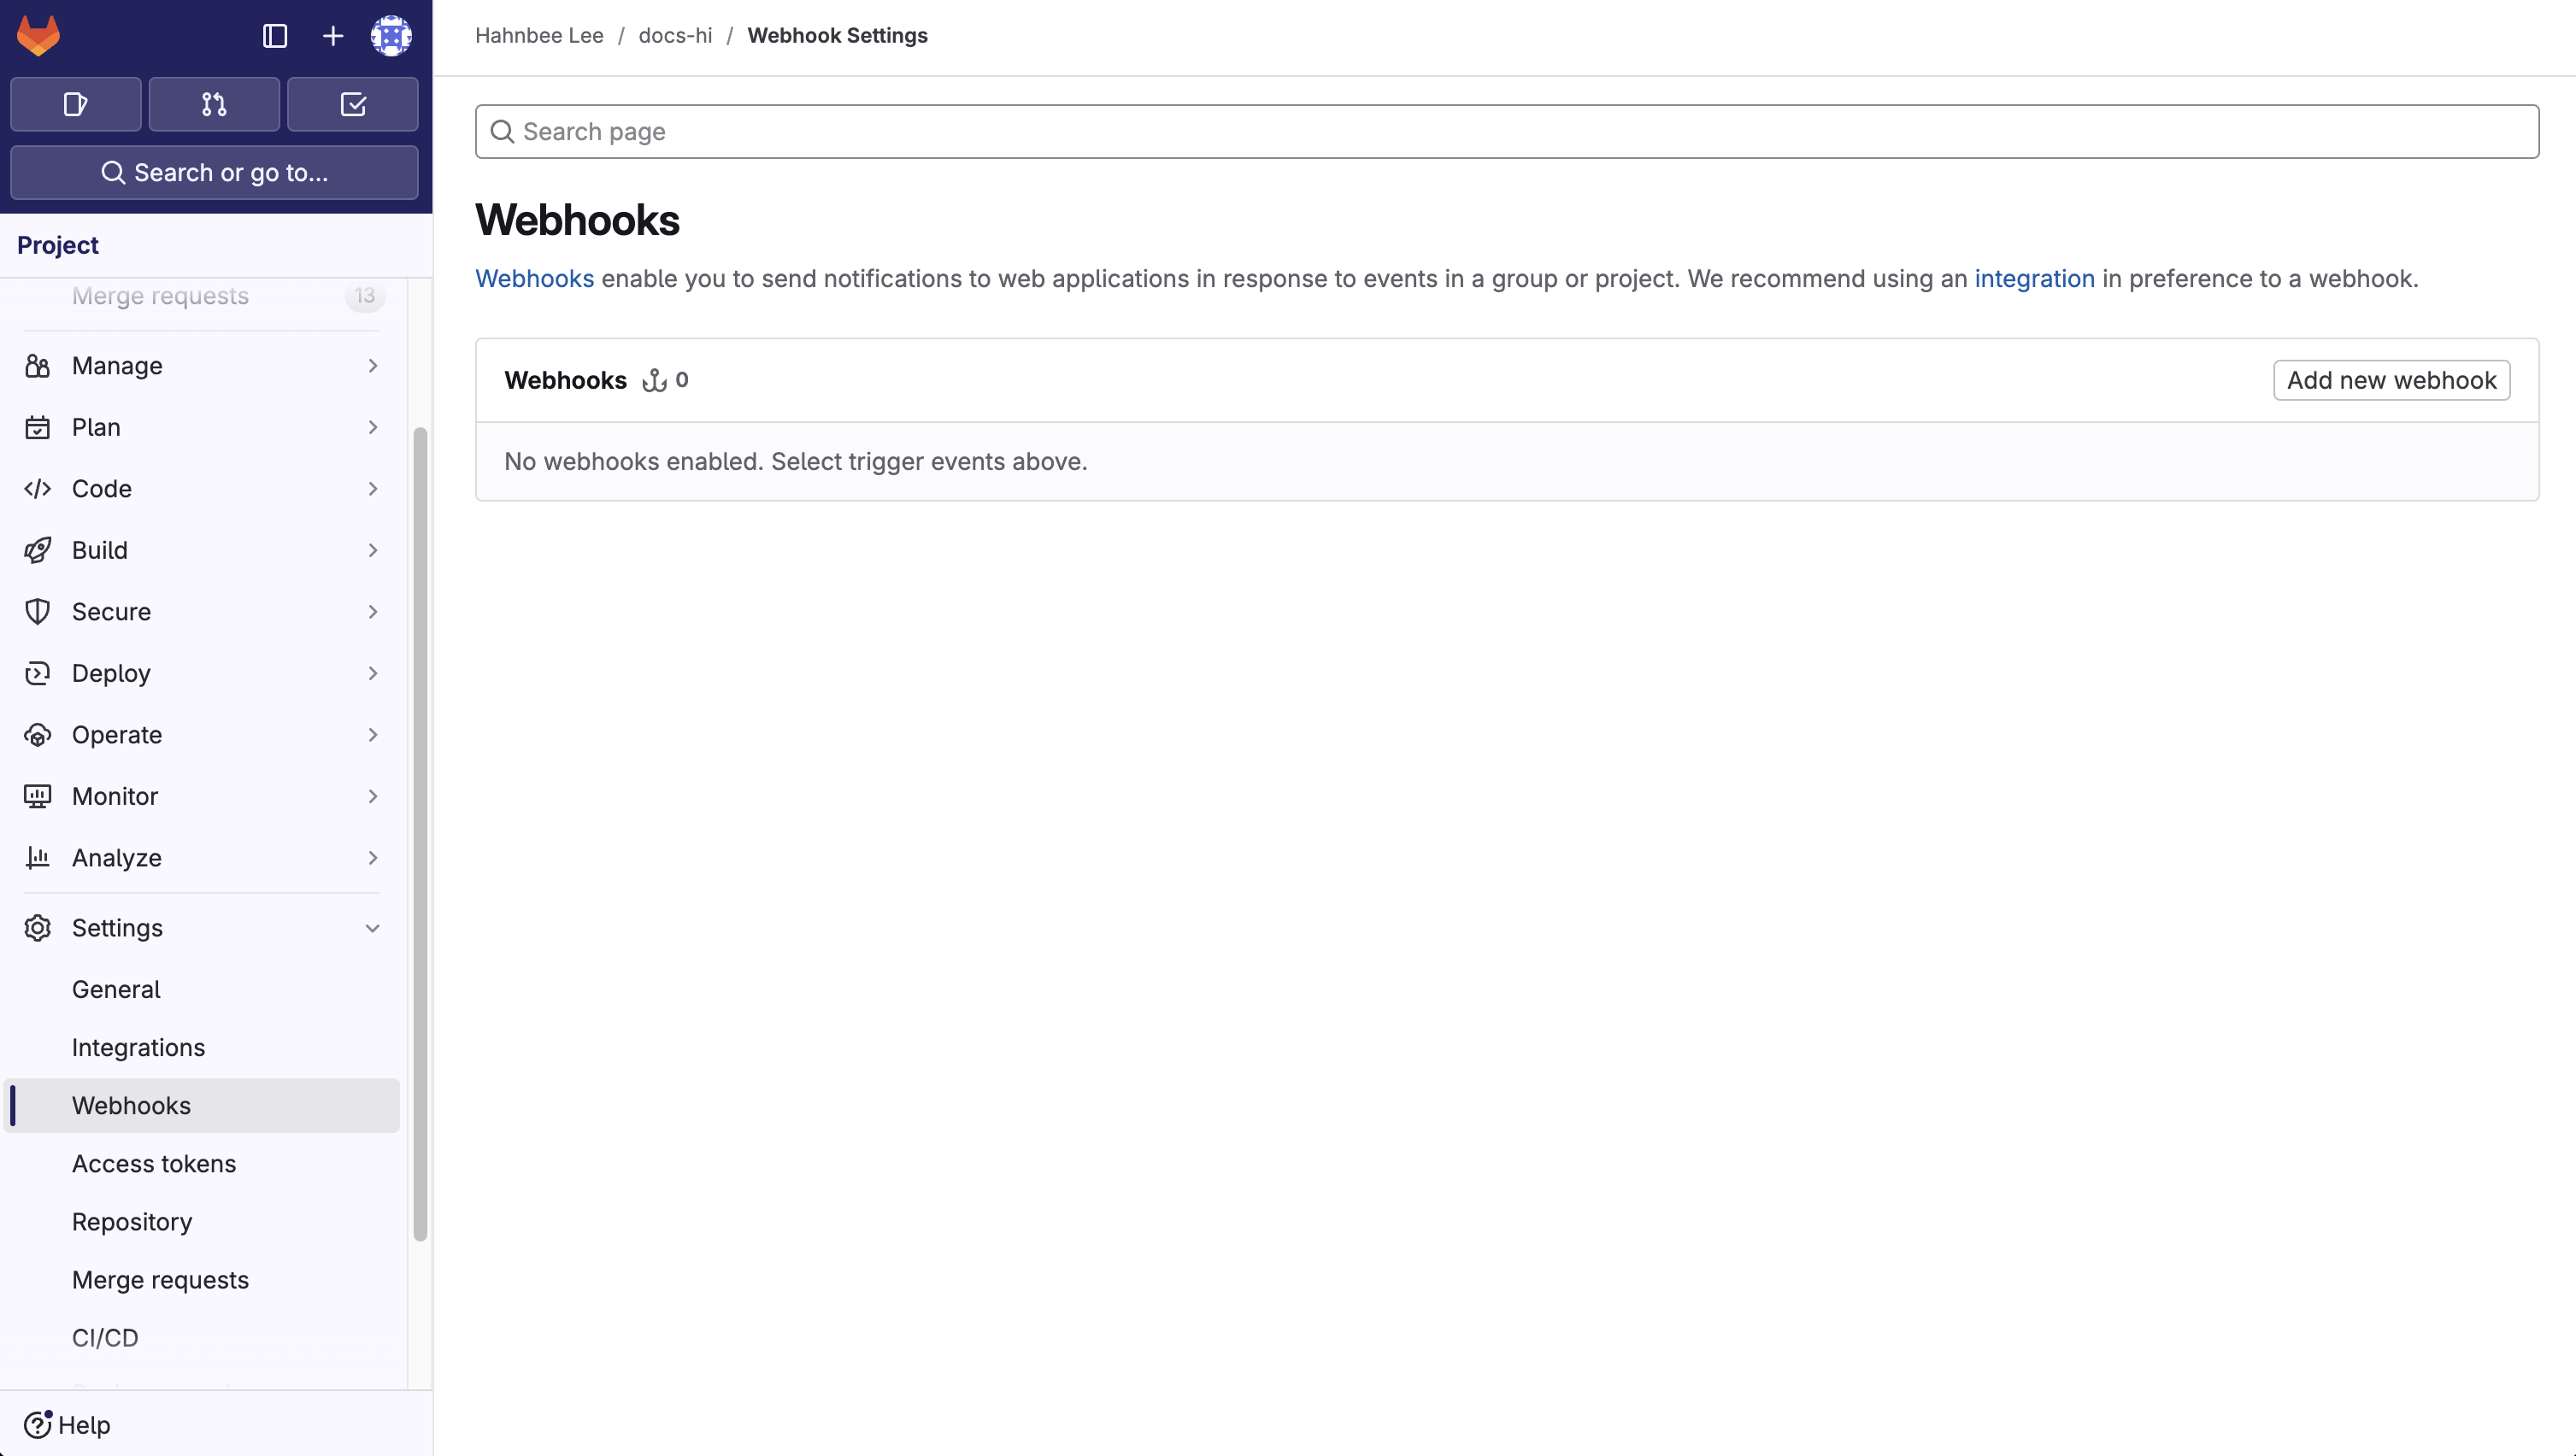
Create the webhook
Webhooks allow us to receive events when changes are made so that we can automatically trigger deployments.1
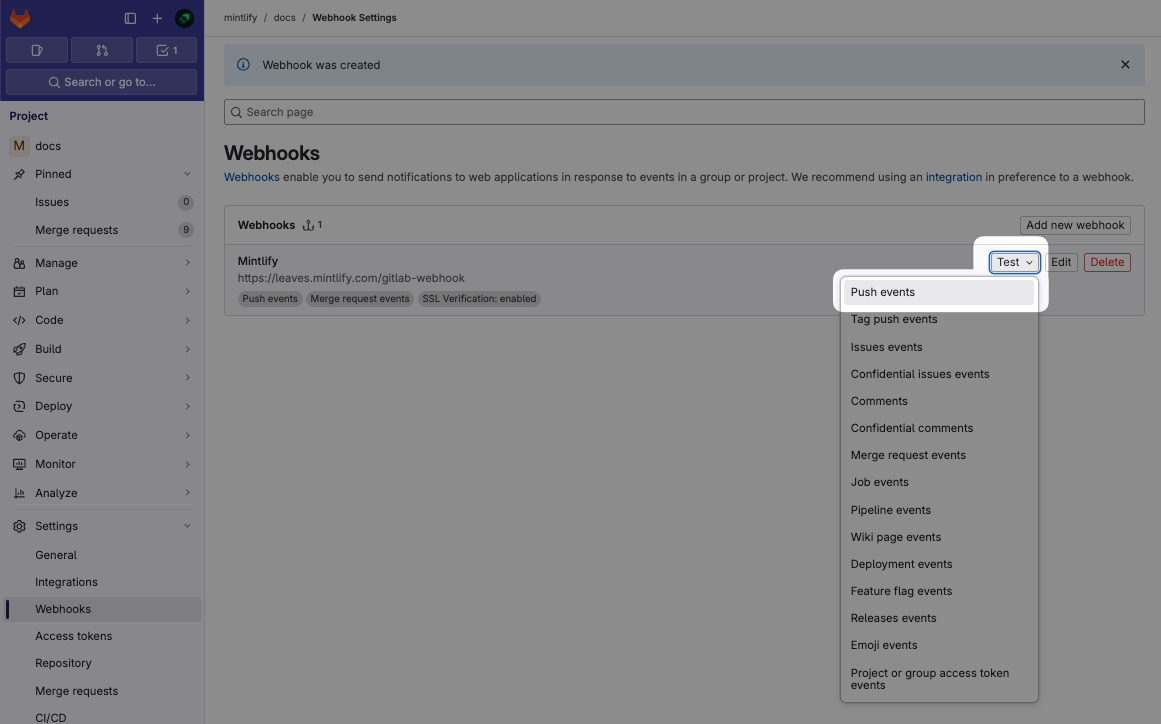
Navigate to Settings > Webhooks and click 'Add new Webhook'
2
Set up URL and webhook
In the “URL” field, enter the endpoint
https://leaves.mintlify.com/gitlab-webhook and name the webhook “Mintlify”.3
Paste token
Paste the Webhook token generated after setting up the connection.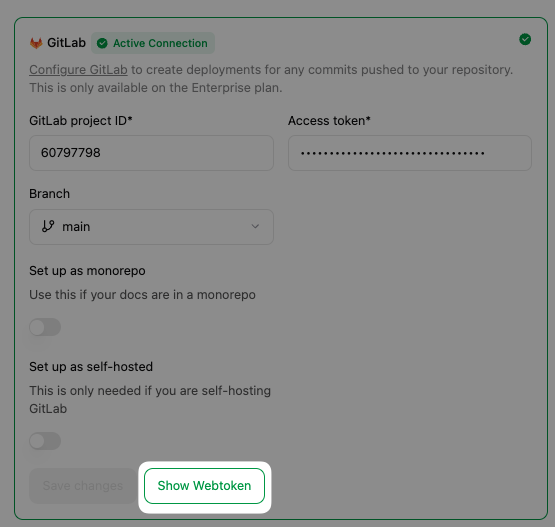
4
Select events
Select these events to trigger the webhook: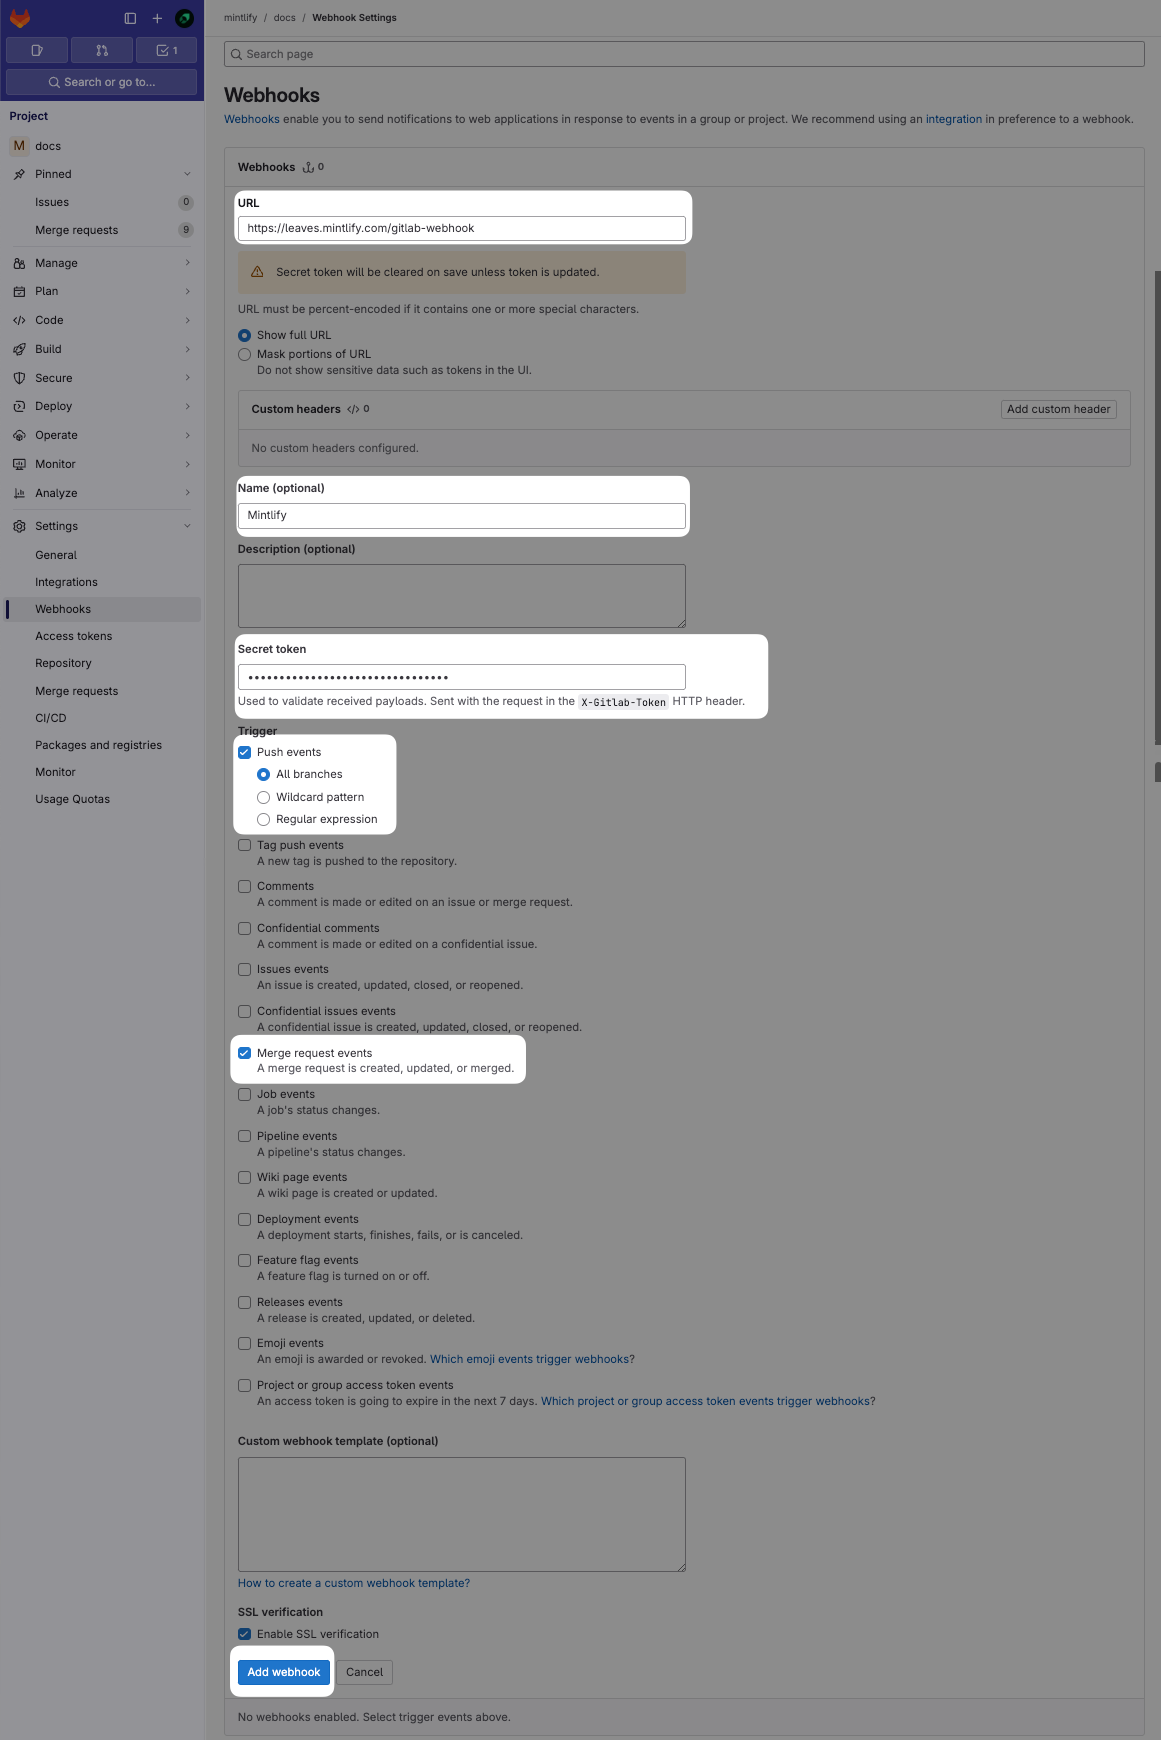
- Push events (All branches)
- Merge requests events
5
Test the Webhook
After creating the Webhook, click the “Test” dropdown and select “Push events” to send a sample payload to ensure it’s configured correctly. It’ll say “Hook executed successfully: HTTP 200” if configured correctly.This will help you verify that everything is working correctly and that your documentation will sync properly with your GitLab repository.